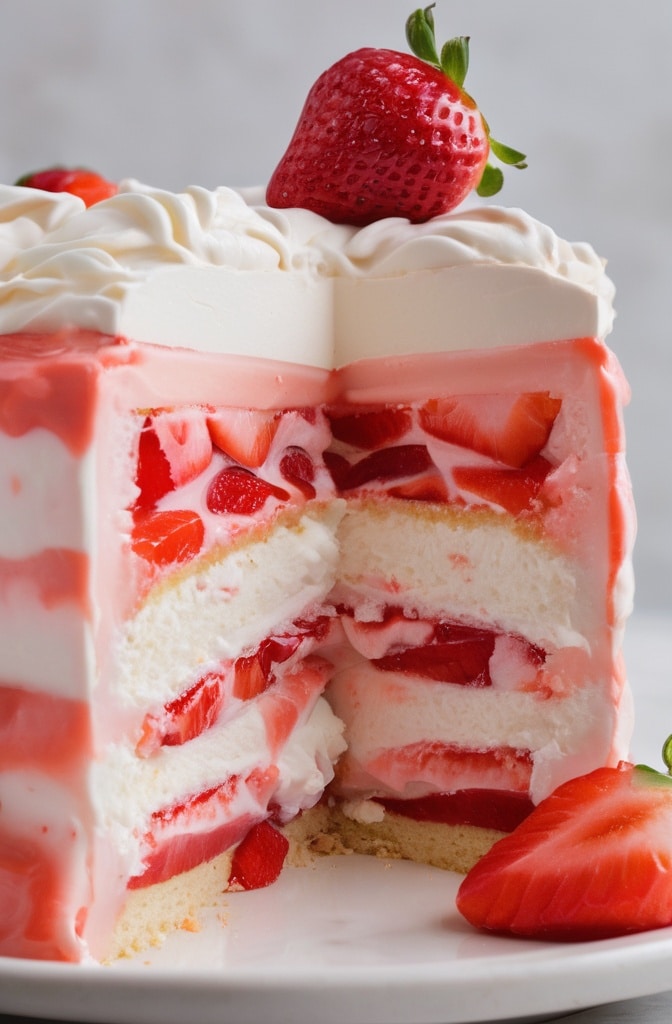
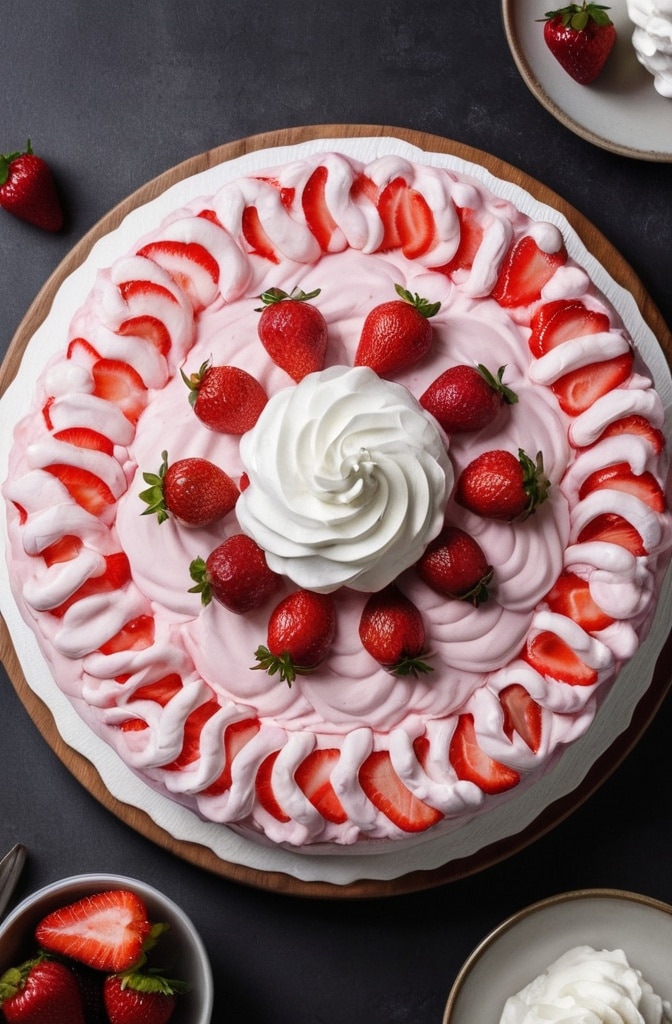
I still remember the first time I encountered a proper No Bake Strawberry Cloud Cake Recipe. It was at my mentor’s summer garden party in Provence, where the temperature had soared to an unbearable 38°C. Nobody wanted to even look at an oven. Yet, somehow, she presented this ethereal dessert that literally floated off the plate and dissolved on your tongue like a sweet, berry-infused dream. I’ve been perfecting my own version of this No Bake Strawberry Cloud Cake Recipe for over a decade since, and I’m thrilled to finally share it with you.
No-bake desserts ain’t just convenient alternatives to traditional baking—they’re magnificent creations in their own right. This strawberry cloud cake represents the pinnacle of no-bake artistry, combining airy textures, vibrant flavors, and stunning visual appeal without ever requiring an oven. What makes this recipe special is the technique of building flavor layers that complement rather than compete, and the careful balance of textures that creates that signature “cloud-like” experience.
Ingredients & Substitutions
For the Crust
- 250g digestive biscuits (graham crackers make an excellent substitute)
- 120g unsalted butter, melted
- 2 tbsp granulated sugar
- Pinch of flaky sea salt
The foundation of any great cloud cake is a sturdy yet tender crust. I prefer digestive biscuits for their subtle sweetness and firm texture, but graham crackers work beautifully too. For those seeking a more complex flavor profile, try incorporating 50g of finely chopped toasted nuts (pistachios are my secret weapon). The salt might seem counterintuitive, but it’s absolutely essential for balancing the sweetness and bringing out the buttery notes in the crust.
For the Filling
- 600g fresh strawberries (plus extra for decoration)
- 250g mascarpone cheese, room temperature
- 400ml heavy whipping cream (min. 36% fat)
- 180g confectioners’ sugar, sifted
- 2 tsp high-quality vanilla extract or 1 vanilla bean, seeds scraped
- 15g powdered gelatin
- 60ml cold water
- Zest of 1 lemon
When selecting strawberries, look for fragrant, fully ripened berries—the deeper red the better. If fresh strawberries aren’t available, frozen can work, though you’ll need to thaw and drain them thoroughly to prevent excess moisture. Mascarpone provides a luxurious mouthfeel that’s difficult to replicate, but a mixture of cream cheese and crème fraîche (200g + 50g) can serve as a reasonable alternative. The gelatin is non-negotiable if you want proper structure, tho vegetarians can substitute with agar-agar (use about 6g and activate according to package instructions).
For the Topping
- 200g fresh strawberries, thinly sliced
- 3 tbsp strawberry jam, warmed
- Fresh mint leaves
- Edible flowers (optional)
Step-by-Step Instructions

Preparing the Crust
- Place the biscuits in a food processor and pulse until you achieve a fine, sand-like texture. Transfer to a mixing bowl and stir in the melted butter, sugar, and salt until the mixture resembles wet sand. A common mistake is over-processing here—stop pulsing before it becomes a paste.
- Press the mixture firmly into the bottom of a 23cm springform pan using the back of a measuring cup. Ensure its compacted well, especially at the edges where structural integrity is crucial. The flat bottom of a glass works parfectly for this if you don’t have a measuring cup.
- Refrigerate the crust for at least 30 minutes while preparing the filling. This step is vital for solidifying the butter and creating a stable base. For special occasions, I sometimes brush the chilled crust with a thin layer of melted white chocolate to create a moisture barrier between crust and filling—a technique worth mastering.
Creating the Filling
- Bloom the gelatin by sprinkling it over the cold water in a small bowl. Let it stand for 5 minutes until it becomes spongy. Meanwhile, hull and roughly chop 400g of the strawberries, reserving the rest for the puree.
- In a blender or food processor, puree 200g of strawberries until smooth. Strain through a fine-mesh sieve to remove seeds if desired, tho I typically skip this step as I prefer the rustic texture and visual appeal the seeds provide.
- Heat the strawberry puree in a small saucepan over medium-low heat until just warm—not boiling. Remove from heat, add the bloomed gelatin, and stir until completely dissolved. Let cool to room temperature, stirring occasionally to prevent skinning.
- In a large mixing bowl, beat the mascarpone with half the confectioners’ sugar until smooth. Many chefs make the mistake of overbeating mascarpone, which can cause it to separate—mix just until incorporated and smooth.
- In a separate bowl, whip the heavy cream with the remaining sugar and vanilla until firm peaks form. The difference between soft and firm peaks is crucial here—you want the cream to hold its shape without being grainy.
- Gently fold the mascarpone mixture into the whipped cream, being careful not to deflate the air incorporated during whipping. Folding technique matters significantly—use a rubber spatula and a figure-eight motion, rotating the bowl as you go.
- Divide the mixture in half. Fold the cooled strawberry-gelatin mixture into one half, then fold in the chopped strawberries and lemon zest. This creates two distinct layers with different flavor intensities.
Assembling the Cake
- Pour the plain cream mixture over the chilled crust, using an offset spatula to create an even layer. Refrigerate for 15-20 minutes until slightly set—this prevents the layers from blending.
- Carefully pour the strawberry cream mixture over the partially set plain layer, smoothing the top with an offset spatula. The key is working rapidly but gently to maintain the cloud-like texture.
- Refrigerate for at least 6 hours, preferably overnight. Patience is your greatest ally here—rushing this step will result in a cake that slices poorly and lacks structural integrity.
Finishing Touches
- About 30 minutes before serving, arrange the sliced strawberries on top of the cake in a decorative pattern. I prefer a slightly overlapping circular design that mimics rose petals, but feel free to express your creativity.
- Gently brush the arranged strawberries with warmed strawberry jam for a professional glazed finish that both enhances visual appeal and prevents the berries from drying out.
- Just before serving, garnish with fresh mint leaves and edible flowers if using. These should be added at the last moment to maintain their vibrant appearance.
Cooking Techniques & Science
Understanding the science behind this no-bake masterpiece enhances both appreciation and execution. The cloud-like texture relies on a precise balance between fat, air, and gelatin. When whipping the cream, you’re essentially creating a colloid—tiny fat globules suspended in liquid, trapping air bubbles. The gelatin then stabilizes this delicate structure through its unique protein properties.
Temperature control is paramount throughout the process. Blooming gelatin in cold water allows the protein molecules to hydrate effectively, while dissolving it in warm (not hot) liquid prevents denaturing. Similarly, using room-temperature mascarpone ensures smooth incorporation without clumping or separating.
One technique that elevates this cake beyond typical no-bake desserts is the dual-layer approach. By creating two distinct textures—one pure cream, one strawberry-infused—you create a tasting experience that evolves as you eat. The gradual transition from subtle vanilla to intense berry flavors creates what professional pastry chefs call a “flavor journey.”
The tool I consider essential for this recipe is a high-quality springform pan with a tight seal. Leakage during setting can ruin hours of work. Before starting, always test your pan by filling it with water to check for leaks. If you find any, a quick wrap of the bottom with aluminum foil provides an effective safety measure.
Serving & Pairing Suggestions
When unmolding this delicate creation, run a thin knife around the edge of the pan before releasing the springform. For the cleanest cuts, dip your knife in hot water and wipe dry between slices.
For plating, I recommend a minimalist approach on white porcelain to highlight the cake’s natural beauty. A small pool of strawberry coulis on the plate creates an elegant backdrop, while a light dusting of freeze-dried strawberry powder adds texture and intensifies the berry flavor profile.

This cloud cake pairs magnificently with champagne or prosecco, the effervescence creating a delightful contrast to the cake’s creamy texture. For non-alcoholic pairings, try a lightly sweetened matcha tea or a sparkling elderflower beverage.
To elevate this dessert for special occasions, consider accompanying each slice with a quenelle of lightly macerated strawberries or a small scoop of strawberry sorbet for temperature contrast.
Conclusion
The No Bake Strawberry Cloud Cake represents the perfect marriage of technical skill and sensory delight. What makes it exceptional is the balance—not too sweet, not too rich, with a perfect interplay of textures from the crisp base to the ethereal filling.
Remember that mastering this recipe is about understanding the principles rather than rigidly following steps. The ability to adjust for variables like fruit ripeness, ambient humidity, and gelatin strength is what separates the professional from the amateur.
For those looking to experiment, consider seasonal variations—white peaches in summer, blood oranges in winter, or perhaps a rhubarb-strawberry combination in spring. The technique remains the same, but the possibilities are truly endless.
Most importantly, give yourself permission to slow down and enjoy the process. This isn’t a recipe to rush. The methodical building of flavors and textures is precisely what makes the end result so spectacular.
FAQs
Can I make this dessert ahead of time?
Absolutely. In fact, this cake benefits from being made 24 hours in advance, allowing flavors to meld and textures to set properly. It can be refrigerated for up to 3 days, though the crust may soften slightly after the second day. I suggest adding the fresh strawberry topping and glaze only within 4 hours of serving for optimal visual appeal.
My filling didn’t set properly. What went wrong?
The most common culprit is improper gelatin activation or insufficient chilling time. Ensure your gelatin fully blooms (looks spongy with no dry spots) before dissolving it in warm liquid. Also, check that your refrigerator is set below 4°C. If you’re in a particularly humid environment, you might need to increase the gelatin slightly—try an additional 2g.
How can I adapt this recipe for dietary restrictions?
For a lactose-free version, replace the mascarpone with lactose-free cream cheese and the heavy cream with a coconut cream that whips well. For a vegetarian option, substitute the gelatin with agar-agar (6g), but be aware that the texture will be slightly different—more set and less cloud-like. Unfortunately, creating a vegan version that maintains the signature texture is challenging without significant recipe modification.
Why does my cake collapse when I slice it?
This typically happens when the cake hasn’t fully set (minimum 6 hours refrigeration) or when the knife used for cutting is too dull. Always use a sharp knife dipped in hot water and wiped dry between cuts. If the problem persists, consider slightly increasing the gelatin in your next attempt (by about 2g).
Can I freeze this cake?
While technically possible, I don’t recommend freezing as it can compromise the delicate texture. The thawing process often causes moisture separation, resulting in a weepy filling and soggy crust. If you must freeze it, do so without the fresh strawberry topping and allow it to thaw slowly in the refrigerator for at least 24 hours before serving.

