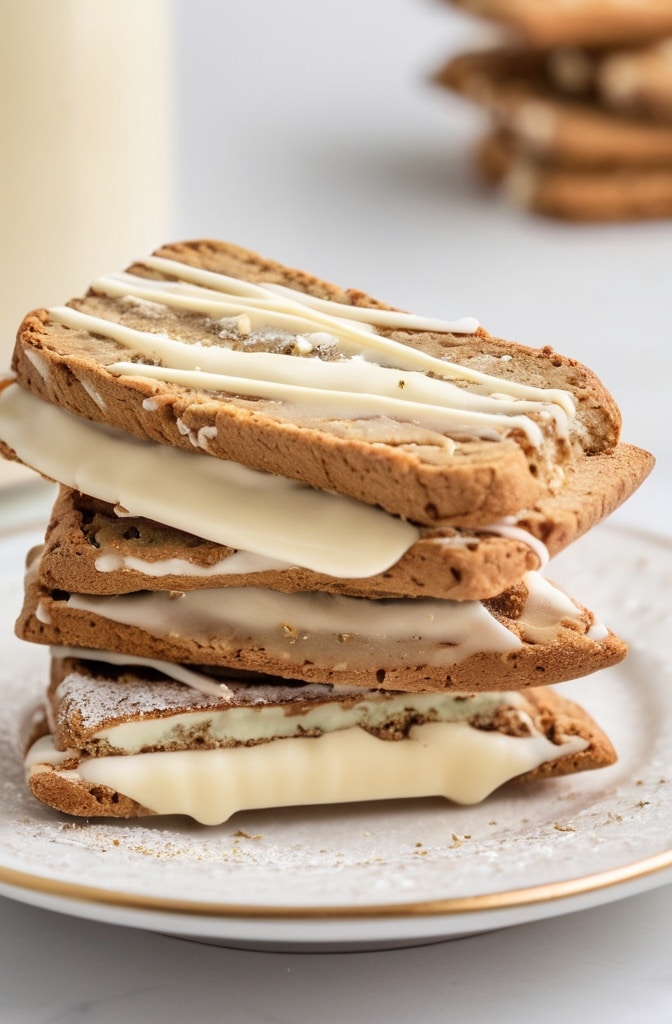
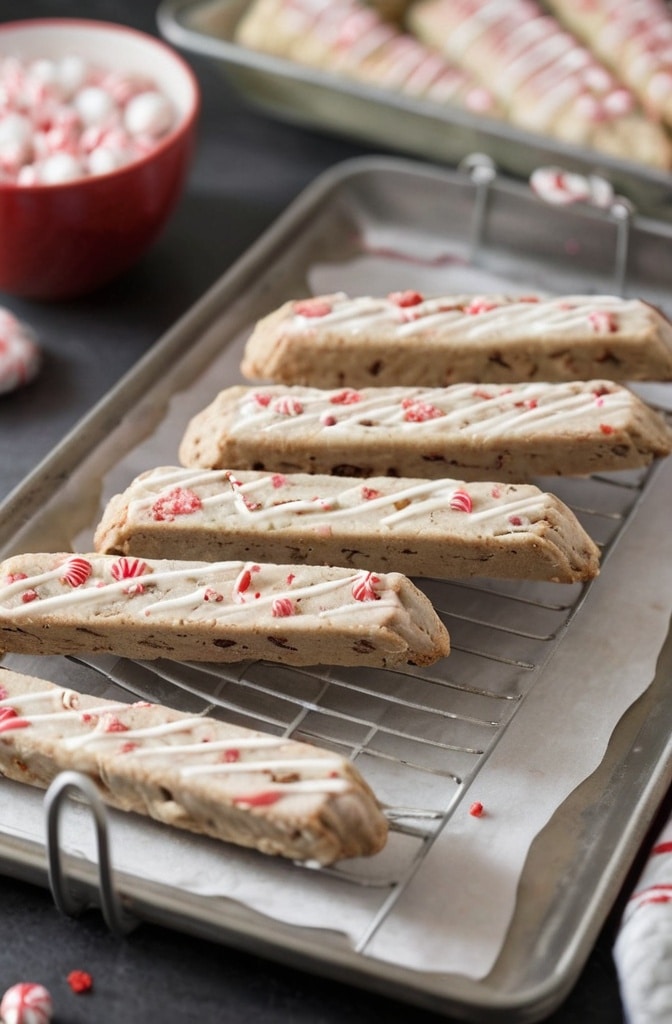
The first time I tasted Andes mints was during Christmas at my grandmother’s house. Those little green-wrapped chocolates stayed with me—a memory wrapped in peppermint and chocolate. Years later, I’ve transformed that nostalgic flavor into something extraordinary: a twice-baked Italian cookie that brings together the refreshing zing of peppermint with the comforting embrace of white chocolate. Ever wondered how to elevate a classic biscotti into something truly festive and memorable? This isn’t just another holiday cookie recipe.
Andes Peppermint Biscotti combines the traditional Italian twice-baked technique with American holiday flavors, creating something both familiar and surprising. What makes these biscotti special is the harmonious balance between the crisp, dunking-friendly texture and the melt-in-your-mouth bursts of peppermint candies and white chocolate. They’ve become my signature holiday gift—packaged in vintage tins, they’ve earned me a reputation among freinds and family as “that biscotti person.”
Ingredients & Substitutions
For the Biscotti Dough:
- 2¾ cups all-purpose flour (350g)
- 1 teaspoon baking powder
- ½ teaspoon salt
- ½ cup unsalted butter, softened (113g)
- 1 cup granulated sugar (200g)
- 3 large eggs, room temperature
- 2 teaspoons pure peppermint extract
- 1 teaspoon pure vanilla extract
- ½ teaspoon almond extract (optional, enhances flavor complexity)
- ¾ cup crushed Andes mints or peppermint candies (120g)
- ⅓ cup mini chocolate chips (optional, 60g)
For the Finishing Touches:
- 12 ounces high-quality white chocolate, chopped (340g)
- ⅓ cup crushed peppermint candies or Andes mints (60g)
- 1 tablespoon vegetable shortening (optional, helps thin chocolate for dipping)
The flour choice matters tremendously here—all-purpose gives the perfect balance between structure and tenderness. For gluten-sensitive folks, a 1:1 gluten-free baking blend works surprizingly well, though you’ll lose about 10% of the structural integrity. What most people don’t realize about biscotti is that the fat content is crucial. Traditional Italian versions use little to no butter, while American adaptations incorporate more. Our version splits the difference—enough butter for flavor but not so much that they won’t stand up to a proper coffee dunking.
If Andes mints aren’t available, any good-quality peppermint candy works beautifully—candy canes crushed into rubble create stunning ruby-like speckles throughout the dough. For those avoiding dairy, coconut oil can replace butter (use solid, not melted), though it will impart a subtle coconut undertone that actually complements the peppermint nicely.
Step-by-Step Instructions

Preparing the Dough
- Position your oven rack in the center and preheat to 325°F (165°C). Line two baking sheets with parchment paper or silicone mats—the later being my prefered choice as it prevents any chance of sticking.
- In a medium bowl, whisk together flour, baking powder, and salt. This uniform distribution of leavening agents prevents those awful bitter pockets that can ruin an otherwise perfect biscotti.
- Using a stand mixer fitted with the paddle attachment (or electric beaters if working with a hand mixer), cream butter and sugar on medium speed until light and fluffy, about 3 minutes. Don’t rush this step—proper creaming incorporates air that gives your biscotti its perfect texture.
- Add eggs one at a time, beating well after each addition. If your mixture looks curdled, dont panic! It’ll come together when you add the flour. Mix in peppermint, vanilla, and almond extracts.
- Reduce mixer speed to low and gradually add the flour mixture until just combined. Over-mixing at this stage develops gluten, making your biscotti tough rather than crisp.
- Fold in the crushed Andes mints and mini chocolate chips (if using) with a spatula or wooden spoon. The dough will be slightly sticky—that’s exactly what you want.
Shaping and First Bake
- Divide the dough in half. Using lightly floured hands, shape each portion into a log approximately 12 inches long and 2 inches wide on the prepared baking sheets. The logs should be at least 3 inches apart as they’ll spread during baking.
- For a professional touch, lightly brush the tops with an egg wash (one beaten egg with a tablespoon of water) and sprinkle with a little granulated sugar. This creates a beautiful sheen and slight crunch on top.
- Bake for 25-30 minutes until the logs are firm to the touch and lightly golden around the edges. A common mistake is underbaking this first round—the logs should feel set but still have some give, similar to a slightly underdone cookie.
- Remove from oven and let cool on the baking sheets for exactly 10 minutes—no more, no less. Reduce oven temperature to 300°F (150°C).
Slicing and Second Bake
- Transfer the logs to a cutting board and, using a serrated knife with a gentle sawing motion, slice diagonally into ¾-inch thick pieces. Straight cuts work too, but the diagonal gives you that classic biscotti look and more surface area for chocolate dipping.
- Place the slices cut-side down on the baking sheets. Here’s where most people go wrong—don’t overcrowd the slices or they’ll steam rather than crisp.
- Return to the oven and bake for 12 minutes, then flip and bake for another 12 minutes. For softer biscotti, reduce the second bake time to 8 minutes per side. For extra-crispy cookies perfect for dunking, add 2-3 minutes.
- Cool completely on wire racks before dipping or drizzling with white chocolate. Patience is key here—warm biscotti will melt your chocolate and create a mess.
The White Chocolate Finish
- Place chopped white chocolate and shortening (if using) in a microwave-safe bowl. Heat in 20-second bursts, stirring between each, until just melted. Be extreamly careful not to overheat—white chocolate burns easily and becomes grainy.
- Dip one end of each biscotti into the melted white chocolate, allowing excess to drip off. Place on parchment paper and immediately sprinkle with crushed peppermint candy before the chocolate sets.
- For a more elegant look, drizzle the white chocolate over the biscotti using a fork or piping bag instead of dipping. This creates beautiful, irregular patterns that catch the light.
- Allow the chocolate to set completely at room temperature, about 1-2 hours. You can speed this up by refrigerating for 15-20 minutes, but don’t leave them in the fridge too long or condensation will form when you take them out.
Cooking Techniques & Science
The magic of biscotti lies in its twice-baked technique, which dates back to Roman times when travelers needed shelf-stable sustenance. The first bake sets the dough and develops initial structure, while the second bake drives out moisture, creating that characteristic crisp texture that makes biscotti ideal for dunking. Unlike most cookies that rely on chemical leavening for rise, biscotti gets its lift primarily from eggs, which create a sturdy protein network during baking.
Why crush rather than chop the Andes mints? The irregular pieces create pockets of mint flavor throughout the cookie. When you bite into a larger chunk, you get that delightful burst of peppermint against the canvas of the vanilla-scented dough. Its these flavor dynamics that elevate a simple cookie to a memorable experience.
Temperature control is critical when working with white chocolate. Unlike dark chocolate which contains cocoa solids, white chocolate is primarily cocoa butter, sugar, and milk solids. It melts at a lower temperature (around 110°F/43°C) and seizes easily if overheated. Adding a small amount of vegetable shortening creates a smoother consistency and helps the chocolate set with a beautiful sheen rather than a dull finish.
For the scientifically curious: the peppermint extract contains menthol, which activates cold-sensitive receptors in your mouth. This creates a cooling sensation that contrasts beautifully with the warmth of freshly baked cookies, stimulating multiple sensory pathways simultaneously—a phenomenon food scientists call “dynamic contrast.”
Serving & Pairing Suggestions
Andes Peppermint Biscotti isn’t just a cookie—it’s an experience best enjoyed alongside the right beverages and in the proper setting. Serve these sophisticated treats arranged on a vintage cake stand or marble slab, perhaps nestled among fresh pine sprigs and cinnamon sticks for a holiday table centerpiece that engages all senses.

The ultimate pairing for these biscotti is a rich espresso or cappuccino—the bitter notes of coffee enhance the sweetness of the white chocolate while cutting through its richness. For non-coffee drinkers, hot chocolate with a splash of peppermint schnapps (adults only!) creates a sensational flavor echo. A surprising but brilliant match is Earl Grey tea, whose bergamot notes harmonize unexpectedly well with peppermint.
These biscotti make exceptional gifts. Pack them in cellophane bags tied with ribbon, or arrange them in a beautiful tin lined with parchment paper. For an extra touch, include a handwritten note explaining that “biscotti” comes from the Latin “bis coctus,” meaning “twice cooked”—a conversation starter guaranteed to impress.
Storage & Make-Ahead Tips
Properly stored in an airtight container at room temperature, these biscotti will keep for up to 3 weeks—making them ideal for advance holiday preparation. For longer storage, skip the white chocolate coating, freeze the plain biscotti for up to 3 months, then thaw and apply the chocolate finish before serving.
The dough can be made and shaped into logs up to 24 hours ahead, wrapped tightly, and refrigerated before the first bake. This actually improves flavor complexity as the ingredients have time to meld. Allow the refrigerated logs to sit at room temperature for 30 minutes before baking.
Conclusion
Andes Peppermint Biscotti represents everything I love about holiday baking—tradition transformed through creativity, familiar flavors presented in unexpected ways, and the pure joy of sharing something made with care. The real magic happens when someone takes their first bite, closes there eyes, and says, “Oh, this tastes like Christmas.”
What sets these biscotti apart isn’t just the festive flavor combination but the attention to technique. The twice-baked method creates the perfect canvas for showcasing the peppermint and white chocolate, while maintaining that essential biscotti snap. They’re elegant enough for a holiday party but durable enough to ship to distant loved ones.
Remember that biscotti-making is partly science, partly art. Your kitchen’s humidity, your oven’s quirks, even the brand of flour you use can affect the final result. Don’t be afraid to trust your instincts and adjust accordingly—that’s what separates a good baker from a great one.
FAQs
Why did my biscotti spread too much during the first bake?
This typically happens when butter is too soft or the dough is overmixed. Try chilling the shaped logs for 20 minutes before baking, or add an additional 2-3 tablespoons of flour to the dough if you live in a humid climate.
Can I make these without peppermint extract if I’m only using the Andes mints?
Absolutely, though I’d recommend keeping at least ½ teaspoon of peppermint extract for consistent flavor throughout. The extract distributes the mint flavor evenly, while the candy pieces provide bursts of intensity and visual appeal.
My white chocolate seized and became grainy. Can I save it?
Unfortunately, once white chocolate seizes, it’s difficult to restore its smooth texture. To prevent this, make sure all bowls and utensils are completely dry (even a drop of water can cause seizing), and heat the chocolate very gently. If disaster strikes, repurpose the seized chocolate by mixing it into pancake or muffin batter.
How do I get clean cuts when slicing the baked logs?
Use a long serrated knife with a gentle sawing motion rather than pressing down. If the logs crumble when cutting, they may be either too hot (wait the full 10 minutes of cooling time) or too cool (don’t wait longer than 15 minutes). The perfect temperature window is narrow!
Can I use dark or milk chocolate instead of white chocolate?
Certainly! Dark chocolate creates a lovely contrast with the peppermint, while milk chocolate offers a creamier finish. If using dark chocolate, consider adding a teaspoon of coconut oil to help it melt smoothly and set with a nice shine.

