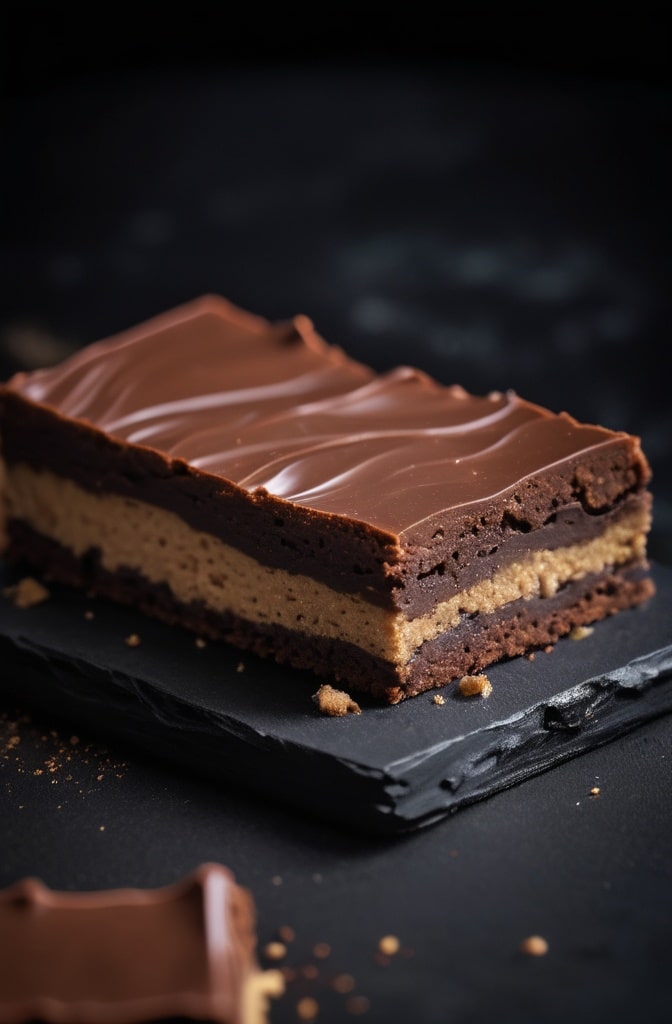
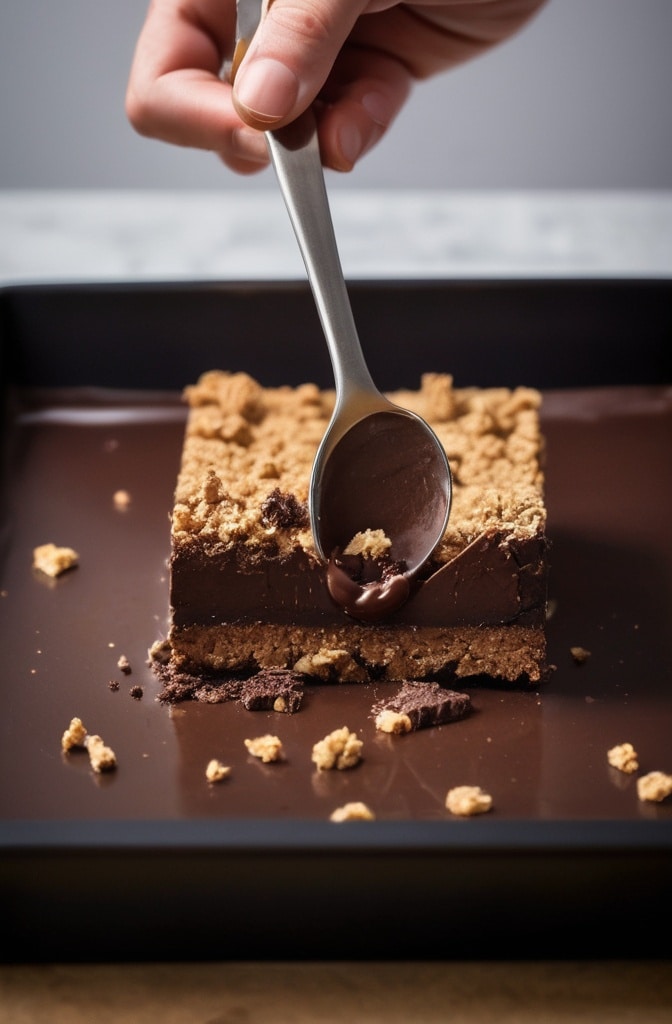
You know that moment when nostalgia hits you right in the taste buds? That’s exactly what happened to me last Christmas when my gran pulled out her signature Bourbon Biscuit Tray Bake. The familiar chocolatey aroma transported me straight back to childhood afternoons spent in her kitchen, pinching bits of dough when she wasn’t looking. This classic British treat essentially the beloved bourbon biscuit reimagined as a decadent Bourbon Biscuit Tray Bake slice—deserves a proper revival in our baking repertoires.
What makes the bourbon biscuit tray bake so special? Its that perfect balance between rich chocolate sponge, velvety cream filling, and the distinctive bourbon biscuit flavor profile that generations have adored. Plus, unlike its sometimes fiddly sandwich biscuit counterpart, this traybake version delivers all that nostalgic flavor with significantly less effort—yet creates somthing that looks properly impressive when sliced.
1. Ingredients & Substitutions
For the Chocolate Sponge Base:
- 250g unsalted butter, room temperature
- 250g caster sugar
- 4 medium eggs
- 200g self-raising flour
- 50g cocoa powder (Dutch-processed for deeper flavor)
- 1 tsp baking powder
- 2 tbsp whole milk
- 2 tsp vanilla extract
- 1/4 tsp salt
- 2 tbsp golden syrup (or corn syrup)
For the Classic Bourbon Filling:
- 150g unsalted butter, softened
- 300g icing sugar, sifted
- 3 tbsp cocoa powder
- 1 tsp vanilla extract
- Pinch of salt
- 1-2 tbsp whole milk (as needed for consistency)
For the Chocolate Topping:
- 200g quality dark chocolate (around 50-60% cocoa solids)
- 100g unsalted butter
- 1 tbsp golden syrup
- 100g bourbon biscuits, roughly crushed (for decoration)
If you’re catering to dietary restrictions, don’t panic. For a dairy-free version, swap the butter for a high-quality plant-based block butter (not the spreadable kind—it contains too much water). Plant-based milks work too, but oat milk gives the closest flavor profile to dairy. Got gluten issues? Self-raising gluten-free flour blends work suprisingly well here, though I’d recommend adding an extra 1/4 tsp of xanthan gum for structure.
The quality of your cocoa powder makes a tremendous difference in this recipe. Dutch-processed cocoa delivers that authentic bourbon biscuit depth, but natural cocoa will work in a pinch—the cake will just have a slightly different flavor profile and a touch more acidity. Whatever you do, don’t use hot chocolate powder—thats a rookie mistake that’ll leave you with a sadly underwhelming bake.
2. Step-by-Step Instructions

Preparing the Chocolate Sponge
- Preheat your oven to 180°C (160°C fan/350°F). Line a 9×13-inch traybake tin with parchment paper, leaving some overhang to help lift the finished cake. The overhang is dead important—without it, you’ll struggle to get the finished bake out in one piece.
- Cream the butter and sugar until properly pale and fluffy—this should take about 4-5 minutes with an electric mixer. Many home bakers rush this step, but it’s critical for aerating the mixture. You want it almost mousse-like in texture.
- Add the eggs one at a time, beating well after each addition. If the mixture starts to curdle (looks a bit like scrambled eggs), don’t freak out! Chuck in a tablespoon of your weighed flour to stabilize it.
- Sift together the flour, cocoa powder, baking powder, and salt. Fold this into the wet ingredients using a large metal spoon or silicone spatula—a gentle hand is crucial here. Overmixing will develop the gluten and leave you with a tough sponge.
- Stir in the milk, vanilla extract, and golden syrup until just combined. The golden syrup adds that subtle caramel note that makes bourbon biscuits so addictive.
- Spread the batter evenly into your prepared tin. Run a palette knife under hot water, wipe it dry, then use it to smooth the surface for an even bake.
- Bake for 25-30 minutes until risen and a skewer inserted into the center comes out with just a few moist crumbs. Don’t overbake! A slightly fudgy center is part of the charm.
- Allow to cool completely in the tin before attempting to remove or frost. Seriously—patience is non-negotiable here. Rushing this step is how you end up with a broken cake and tears.
Creating the Bourbon Filling
- Using an electric mixer, beat the softened butter until creamy and pale—about 2-3 minutes.
- Gradually add the sifted icing sugar and cocoa powder, beating on low speed initially to avoid a kitchen snowstorm, then increasing to medium-high once incorporated.
- Mix in the vanilla extract and salt, then add milk a teaspoon at a time until you achieve a spreadable but firm consistency. You’re aiming for something that holds its shape but spreads easily—think luxury hotel pillow firmness.
- Once the cake is completely cool, spread the filling evenly across the surface. Pop it in the fridge for 20-30 minutes to firm up slightly before adding the topping. This prevents the layers from merging into each other.
The Perfect Chocolate Topping
- Break the chocolate into small pieces and place in a heatproof bowl with the butter and golden syrup.
- Melt gently over a pan of barely simmering water (double-boiler method), stirring occasionally. Keep the heat low—chocolate is temperamental and will seize if overheated.
- Once completely smooth, remove from heat and allow to cool slightly for 5-10 minutes. You want it pourable but not hot enough to melt your filling layer.
- Pour the chocolate mixture over the filling layer, tilting the tin to create an even coating. Work quickly but confidently here.
- Immediately sprinkle the crushed bourbon biscuits over the top, pressing them lightly into the chocolate so they stick but don’t sink.
- Refrigerate for at least 1 hour until the topping is completely set before slicing. For the cleanest cuts, dip your knife in hot water and wipe clean between slices.
3. Cooking Techniques & Science
The magic of a perfect bourbon biscuit tray bake lies in understanding a few key baking principles. First, creaming butter and sugar isn’t just a mixing step—it’s a crucial process that creates tiny air pockets that expand during baking, creating that beautiful tender crumb structure. When you see “cream until pale and fluffy,” it’s literally changing the physical properties of your cake.
Temperature control is another critical factor. Room temperature ingredients blend more harmoniously and trap air more effectively. Cold eggs can cause your carefully creamed butter-sugar mixture to curdle, while melted butter can’t trap the same amount of air. That’s why experienced pastry chefs are such sticklers for ingredient temperature.
The addition of golden syrup serves two purposes: flavor and texture. Chemically speaking, the invert sugars in golden syrup help retain moisture and create that slightly chewy, fudgy texture that makes this traybake so moreish. Its also responsible for that subtle caramel note that authentic bourbon biscuits have.
When it comes to equipment, a good quality, heavy-bottomed traybake tin makes all the difference. Cheap, thin tins conduct heat too aggressively, leading to overdone edges and underbaked centers. If you’re serious about baking, invest in decent quality tins—they’ll outlast dozens of the flimsy alternatives.
For the filling, the process of beating the butter before adding sugar creates a emulsion that traps air, making for a lighter, less greasy mouthfeel. If your filling ever splits or looks curdled, it’s usually because either the butter was too warm or you added liquid too quickly. The fix? A brief stint in the fridge followed by rebeating.
4. Serving & Pairing Suggestions
The bourbon biscuit tray bake has this remarkable ability to feel simultaneously homey and sophisticated, depending on how you serve it. For a casual family tea, simply slice into generous squares and serve on a rustic wooden board with a pot of proper English breakfast tea.
For more elegant occasions, cut into smaller rectangular fingers (closer to the original biscuit shape), dust with a little gold-lustered cocoa powder, and arrange on a mirrored platter with fresh raspberries or physalis for color contrast. The slight acidity of these fruits cuts beautifully through the richness.

Coffee pairings bring out different notes in the chocolate. An espresso highlights the deeper cocoa flavors, while a latte complements the creamy filling. For something a bit special, try serving with a chocolate orange liqueur or a splash of amaretto—both enhance the bake’s flavor profile in interesting ways.
Temperature matters too. While traditionaly served at room temperature, slightly chilled slices have a more distinctly delineated texture between the cake and filling, while warming for 10 seconds in the microwave creates an almost pudding-like experience. In summer, I’ve even been known to sandwich a thin slice of good vanilla ice cream between two layers for an audacious bourbon biscuit ice cream sandwich.
For a showstopping dessert table centerpiece, try creating a pyramid display of alternating plain and white chocolate-drizzled slices, or use small pieces as the crowning glory atop chocolate mousse served in elegant glass coupes.
Conclusion
The humble bourbon biscuit tray bake represents everything wonderful about British baking—unpretentious ingredients transformed into something truly magnificent through attention to detail and an understanding of flavor balance. What makes this traybake truly special is its versatility and emotional resonance; it’s sophisticated enough for afternoon tea with the in-laws, but familiar enough to be the perfect comfort food on a rainy Sunday.
Master the techniques in this recipe—particularly the proper creaming method and the careful temperature management of your chocolate work—and you’ll create something that transcends the sum of its parts. The slightly bitter cocoa, the sweet vanilla-infused filling, and the snappy chocolate top create a textural symphony that keeps people coming back for “just one more sliver.”
Remember that baking is both science and soul. Measure carefully, but also understand that the most memorable bakes carry a little bit of the baker’s personality. Maybe you’ll add a touch more vanilla, or perhaps a whisper of espresso powder to intensify the chocolate. Whatever your signature touch, this bourbon biscuit tray bake provides the perfect canvas for creating new memories while honoring a beloved classic.
FAQs
Can I make this recipe ahead of time?
Absolutely! The bourbon biscuit tray bake actually improves over 24 hours as the flavors meld together. It keeps beautifully for up to 5 days in an airtight container. You can also freeze undecorated sponge for up to 3 months—just defrost completely before adding the filling and topping.
Why did my chocolate topping crack when I cut into it?
The most common culprit is temperature—if your tray bake is straight from the fridge, the chocolate top will be brittle. Allow it to come to room temperature for about 20 minutes before slicing. Adding a small amount of butter or golden syrup to the chocolate topping (as in this recipe) also helps keep it slightly softer and more sliceable.
Can I use regular digestive biscuits instead of bourbon biscuits for the topping?
You can, but you’ll lose some of that distinctive bourbon biscuit character. If making this substitution, consider adding an extra tablespoon of cocoa powder to your filling and a teaspoon of vanilla to the sponge to compensate for the missing bourbon biscuit flavor.
My filling seems grainy—what went wrong?
Grainy filling usually means the icing sugar wasn’t fully incorporated. Make sure to sift your icing sugar and cocoa powder before adding them to the butter, and beat for longer than you think necessary—at least 3-4 minutes on medium-high speed. Starting with properly softened (but not melted) butter also helps achieve that smooth, velvety texture.
How do I achieve perfectly neat slices?
The pro secret is a hot, clean knife. Fill a tall container with hot water, dip your knife in for a few seconds, wipe completely dry, then make your cut. Clean and reheat the knife between each slice. It’s a bit laborious but delivers bakery-window-worthy results.

