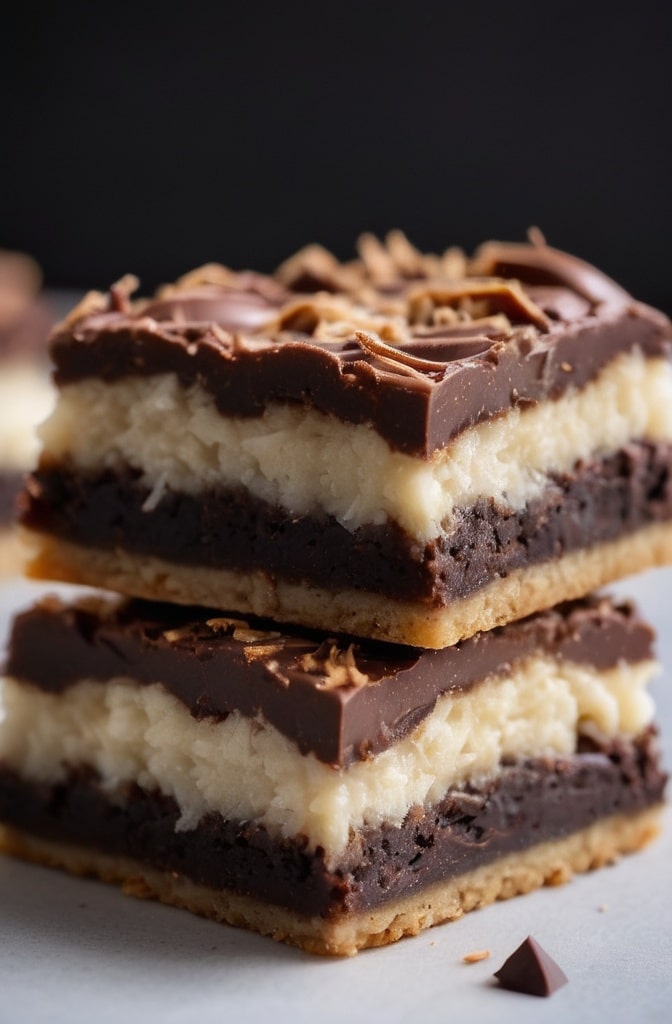
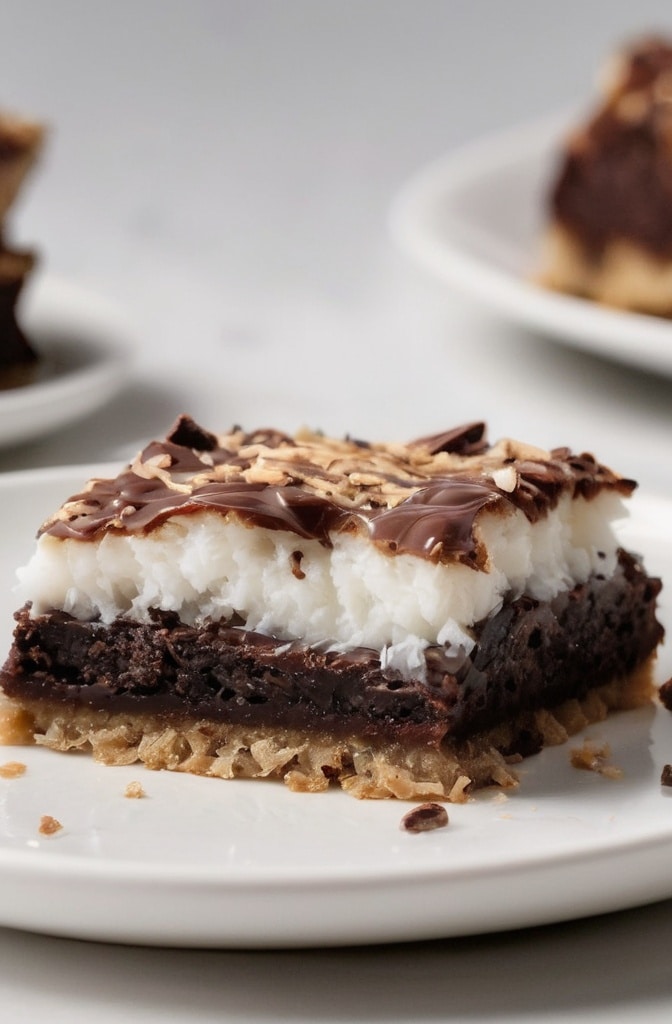
Remember that first time you bit into a perfectly balanced Chocolate Coconut Cookie Bar? The crisp base yielding to chewy coconut and rich chocolate? I certainly do. It was at my grandmother’s kitchen table, where these Chocolate Coconut Cookie Bars were legendary among our family. Twenty years of professional baking later, and I still chase that perfect texture combination.
These aren’t just any dessert bars. They’re the unicorn of cookie bars – versatile enough for bake sales yet sophisticated enough for upscale dinner parties. Chocolate coconut cookie bars represent what I consider the holy trinity of dessert perfection: a buttery shortbread base, a chewy coconut filling, and a decadent chocolate topping that somehow manges to tie everything together without overwhelming.
1. Ingredients & Substitutions
For the Shortbread Base
- 1 cup (226g) unsalted butter, softened but still cool
- ½ cup (100g) granulated sugar
- 2 cups (240g) all-purpose flour
- ¼ teaspoon fine sea salt
- 1 teaspoon vanilla extract
For the base, European-style butter with higher butterfat creates a more tender crumb. If your budget dosn’t stretch that far, regular unsalted butter works perfectly fine. Gluten-free bakers can substitute a 1:1 gluten-free flour blend with xanthan gum added, though you’ll lose some of that distinctive shortbread snap.
For the Coconut Layer
- 3 cups (240g) sweetened shredded coconut
- 1 can (14oz/397g) sweetened condensed milk
- 2 large eggs
- 1 teaspoon vanilla extract
- ¼ teaspoon almond extract (optional)
- ¼ teaspoon salt
Coconut quality matters tremendously here. Look for coconut without added sulfites for the best flavor profile. Some markets carry frozen fresh coconut which can be thawed and dried slightly in a low oven for an exceptional flavor upgrade. Vegans can substitute full-fat coconut milk cooked down with sugar until thick for the condensed milk.
For the Chocolate Topping
- 8oz (226g) high-quality semi-sweet chocolate (60-70% cacao)
- 2 tablespoons unsalted butter
- 1 tablespoon corn syrup (helps with shine)
- Flaky sea salt for finishing (Maldon works beautifully)
The chocolate layer defines these bars, so this is where I recommend agains skimping. Single-origin chocolates from Madagascar or Venezuela offer fruity or nutty undertones that complement coconut perfectly. For a dairy-free option, substitute coconut oil for butter and select dairy-free chocolate.
2. Step-by-Step Instructions

Preparing the Shortbread Base
Preheat your oven to 350°F (175°C) and line a 9×13-inch baking pan with parchment paper, leaving overhang on the sides for easy removal later.
In a stand mixer fitted with the paddle attachment, cream the butter and sugar until just combined – about 1 minute on medium speed. Over-creaming creates air pockets that cause the shortbread to puff and then collapse, so resist the urge to beat until fluffy. Add vanilla and mix briefly.
In a separate bowl, whisk together flour and salt, then add to the butter mixture. Mix on low until the dough looks crumbly but holds together when pressed – kinda like wet sand. This usually takes about 30 seconds. Press the mixture firmly into the prepared pan, creating an even layer. Use the bottom of a measuring cup to really compact it, which prevents a crumbly base.
Bake the shortbread until the edges just begin to turn golden, approximately 15-18 minutes. Don’t fully bake it, as it’ll return to the oven with the coconut layer. Cool for 10 minutes while preparing the coconut layer.
Creating the Coconut Layer
In a large bowl, whisk together the eggs, sweetened condensed milk, vanilla, optional almond extract, and salt until smooth. The almond extract isn’t traditional, but it amplifies the coconut flavor in a way that’s absolutely magical.
Fold in the shredded coconut until evenly coated. The mixture will be thick and somewhat sticky. If your coconut seems particularly dry, let the mixture sit for 5 minutes to allow the coconut to absorb some moisture.
Spread the coconut mixture evenly over the partially baked shortbread base. Use an offset spatula dipped in hot water to make this easier – a little trick I learned from a pastry chef in Paris. The hot spatula glides through the sticky mixture beautifully.
Return to the oven and bake for 20-25 minutes until the coconut layer is set and the edges are golden brown. A proper coconut layer should have a slight jiggle in the center when you gently shake the pan, but shouldn’t look wet or uncooked. Cool completely on a wire rack before adding the chocolate layer.
Perfecting the Chocolate Topping
In a heatproof bowl set over barely simmering water (ensuring the bottom doesn’t touch the water), combine chocolate, butter, and corn syrup. The corn syrup creates that beautiful glossy finish that makes professional desserts stand out.
Stir occasionally until melted and completely smooth. Remove from heat and let cool for 5 minutes – this prevents the heat from melting the perfectly set coconut layer.
Pour the chocolate mixture over the cooled coconut layer, using an offset spatula to spread it evenly to the edges. While still wet, sprinkle with flaky sea salt if desired. The salt creates little pops of flavor that cut through the sweetness.
Refrigerate for at least 1 hour until the chocolate is set. For the cleanest cuts, dip a sharp knife in hot water, wipe dry, and slice with confident, straight-down motions. Clean and reheat the knife between cuts.
3. Cooking Techniques & Science
The structure of these bars relies on proper layering and temperature control. The shortbread base works because butter coats the flour particles, inhibiting gluten formation. This creates that distinctive “short” texture that gives shortbread its name. Under-mixing is actually preferable here, unlike most baking where thorough incorporation is key.
The coconut layer’s magic happens through protein coagulation. As the eggs heat, their proteins denature and form a network that traps moisture and sets the layer. Meanwhile, the condensed milk caramelizes slightly at the edges, creating complexity through Maillard reactions – those same reactions that make roasted coffee and seared steak so flavorful.
Tempering the chocolate properly (through careful heating and cooling) aligns its cocoa butter crystals, resulting in that satisfying snap when you bite into it. If your chocolate looks dull or has white streaks after setting, the crystals didn’t align properly – a condition called bloom. It’s perfectly safe to eat but lacks that professional finish.
For consistent results, invest in an oven thermometer. Most home ovens fluctuate by 25-50 degrees from their set temperature, which can mean the difference between perfectly set coconut and a soupy mess.
4. Serving & Pairing Suggestions
These bars reach their textural peak when served slightly chilled but not cold from the refrigerator. Allow them to sit at room temperature for 15-20 minutes before serving for the perfect balance between firm chocolate and chewy coconut.
For an elevated dessert plate, cut bars into 1×3-inch rectangles and place vertically on a smear of raspberry coulis. Garnish with a quenelle of lightly sweetened whipped cream and a fresh raspberry. The acid in the fruit balances the richness perfectly.
These bars pair exceptionally well with:
- A medium-roast coffee with nutty undertones
- Coconut rum for an amplified flavor experience
- Dessert wines like Sauternes or a late-harvest Riesling
- Spiced chai tea, which complements the chocolate notes
For a spectacular dessert buffet, consider serving alongside complementary textures: fresh fruit tartlets, mousse cups, or crisp tuiles to create a textural journey.
Storage & Make-Ahead Tips

Properly stored in an airtight container, these bars maintain their quality for up to five days at room temperature or two weeks refrigerated. The flavor actually improves on day two as the components meld togther.
For make-ahead convenience, prepare the bars through the coconut layer, then wrap well and freeze for up to three months. Thaw overnight in the refrigerator, then add the chocolate layer before serving.
Chocolate coconut cookie bars also ship exceptionally well, making them perfect for care packages or food gifts. Simply wrap individual bars in parchment, then stack in a rigid container with minimal space for movement.
Creative Variations
- Tropical Twist: Add 1/2 cup finely chopped dried mango and 2 tablespoons lime zest to the coconut layer
- Nutty Indulgence: Sprinkle 1 cup toasted sliced almonds between the coconut and chocolate layers
- Mocha Dream: Add 1 tablespoon espresso powder to the chocolate topping
- Festive Version: Mix 1/3 cup chopped candied cherries into the coconut layer and substitute white chocolate for the topping
The beauty of these bars lies in their adaptability. The basic structure serves as a canvas for countless flavor combinations, limited only by your culinary imagination.
Troubleshooting Common Issues
When professionals develop recipes, they anticipate where things might go wrong. Here are solutions to common chocolate coconut bar problems:
Crumbly shortbread base: Either the butter wasn’t properly incorporated, or the base wasn’t compacted firmly enough. Use the bottom of a measuring cup to really press it down next time.
Undercooked coconut layer: The telltale sign is a wet, overly soft texture. The coconut layer should feel set but yielding when pressed gently. If yours seems undercooked after cooling, you can return it to a 325°F oven for an additional 5-10 minutes.
Chocolate bloom: Those white streaks mean the chocolate wasn’t tempered properly. For home bakers, the simplest solution is adding 1 teaspoon of neutral oil (like grapeseed) to the chocolate mixture, which inhibits bloom formation.
Difficulty cutting cleanly: Patience is key. Ensure bars are completely set, preferably after refrigeration. Then use the hot knife technique mentioned earlier – it’s how pastry shops achieve those perfectly clean edges.
Conclusion
Chocolate coconut cookie bars represent the perfect intersection of accessible technique and sophisticated flavors. Their three distinct layers create a textural symphony that keeps people coming back for “just one more piece.” I’ve served these at everything from children’s birthday parties to wedding receptions, and they never fail to garner compliments.
What I love most about these bars is how they showcase seemingly simple ingredients in their best light. Coconut isn’t just an ingredient here – it’s the star, elevated by its supporting cast of buttery shortbread and rich chocolate.
Whether you’re a novice baker or seasoned professional, these bars deliver consistent, impressive results. And isn’t that what we’re all looking for in a signature recipe? Something reliable yet special, familiar yet distinctive. These chocolate coconut cookie bars check all those boxes and more. They’ve earned their place in my permanent recipe collection, and I suspect they’ll soon earn a place in yours too.
FAQs About Chocolate Coconut Cookie Bars
Can I use unsweetened coconut instead of sweetened?
Yes, but you’ll need to adjust the sweetness. Add an extra 1/4 cup of sugar to the coconut layer if using unsweetened coconut. The texture will be slightly less moist, but many prefer this less-sweet version.
Why did my chocolate layer crack when I cut the bars?
This happens when the chocolate is too cold or set too hard. Allow the bars to come to room temperature for about 15-20 minutes before cutting, and be sure to use the hot knife technique described in the instructions.
Can these bars be frozen?
Absolutely! They freeze beautifully for up to three months. Thaw overnight in the refrigerator while still wrapped to prevent condensation from forming on the chocolate surface.
How do I know when the coconut layer is properly baked?
The coconut layer should be light golden brown around the edges and set in the center. A slight jiggle is fine, but any wet or unset appearance means it needs more time. A toothpick inserted should come out mostly clean but might have a few moist crumbs.
Is it necessary to use parchment paper, or can I just grease the pan?
Parchment paper is strongly recommended for this recipe. The overhang allows you to lift the entire dessert out before cutting, resulting in cleaner edges. If you must use just greasing, be sure to cool the bars completely in the refrigerator before attempting to cut them directly in the pan.

