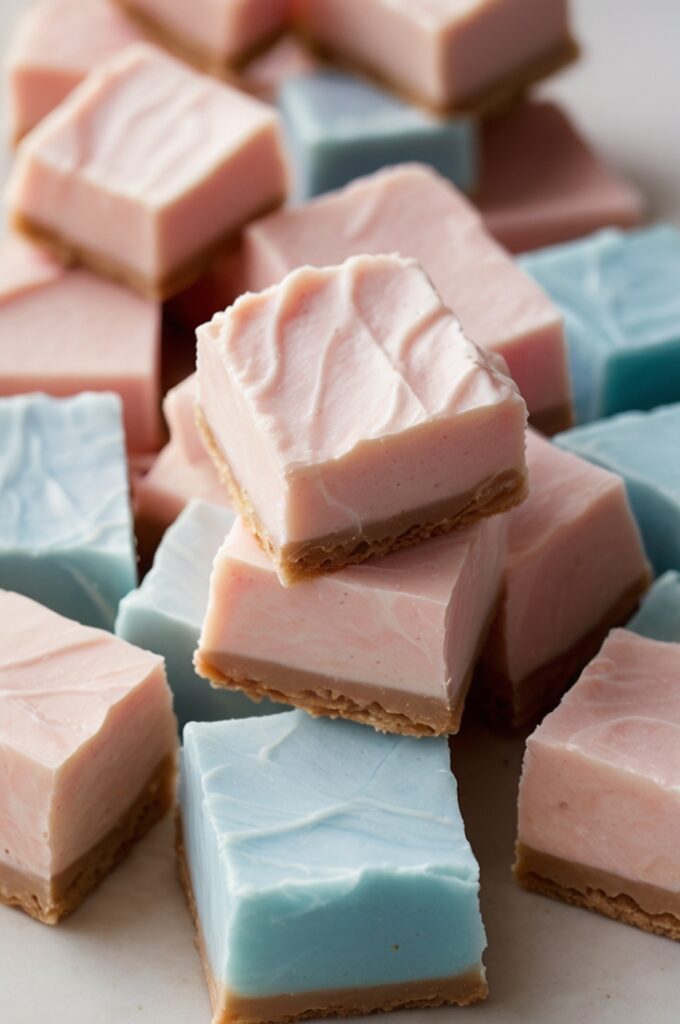
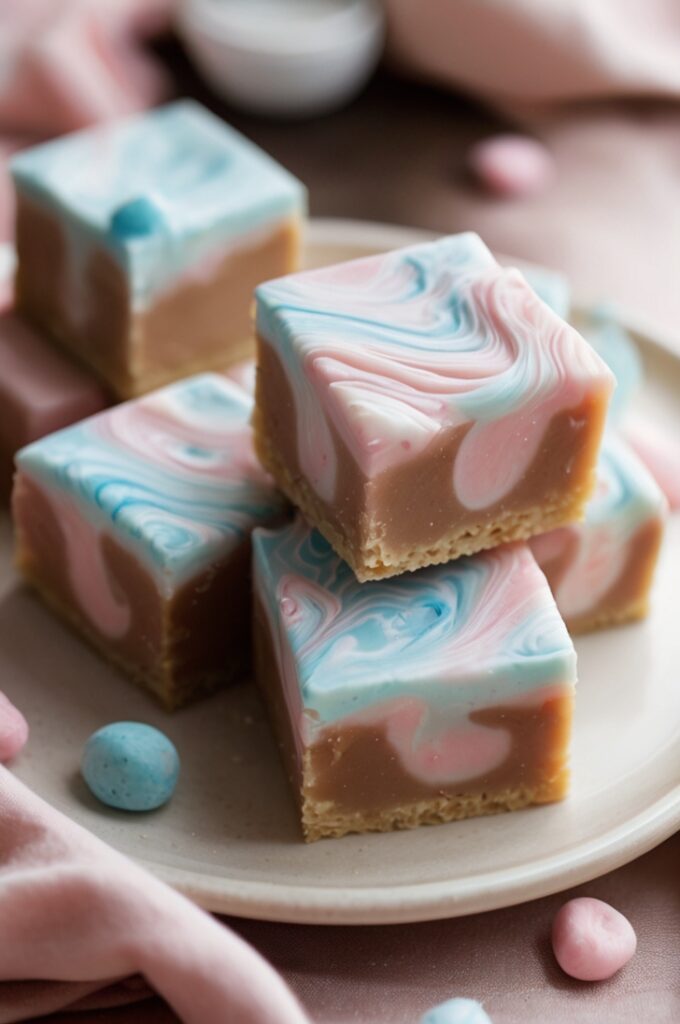
Remember the first time you bit into a cloud of cotton candy at the fair? That magical moment when sugar crystalized into memories? I certainly do. It was a scorching July afternoon in Memphis, and the pink fluff dissolved on my tongue faster than I could savor it. Now imagine capturing that ethereal experience in a perfectly structured square of fudge. That’s exactly what we’re doing today with these Cotton Candy Fudge Squares a sophisticated confection that marries the whimsy of carnival treats with the precision of professional confectionery.
Cotton Candy Fudge Squares ain’t just another sweet treat. They represent a fascinating crossroads of confectionery science, nostalgic flavoring, and precise temperature control. This recipe transforms simple ingredients into a complex sensory experience that delivers the essence of cotton candy in a luxuriously smooth fudge format. Perfect for upscale dessert tables, specialty candy shops, or as a signature item that sets your bakery apart from competitors.
1. Ingredients & Substitutions
Base Ingredients
- 3 cups high-quality white chocolate chips (preferably containing cocoa butter)
- 1 can (14 oz) sweetened condensed milk
- 4 tablespoons unsalted European-style butter
- 1/4 teaspoon fine sea salt
- 2 teaspoons cotton candy flavoring oil (not extract)
- 1 tablespoon light corn syrup
- 2-3 drops pink food coloring gel (professional grade)
- 2-3 drops blue food coloring gel (professional grade)
- 1/2 cup cotton candy sugar crystals (divided)
For the Garnish
- 1/4 cup cotton candy sugar crystals
- 2 tablespoons crushed freeze-dried cotton candy pieces
- Edible pearl dust (optional, for professional finish)
The selection of white chocolate is critical—lower quality compounds containing vegetable fats will result in a granier texture and less stable emulsion. If dietary restrictions require substitutions, high-quality vegan white chocolate can work but you’ll need to decreese the butter to 3 tablespoons and add 1 teaspoon of coconut oil for proper setting.
Cotton candy flavoring oil delivers a more concentrated and heat-stable flavor than extract. If you can only source extract, double the quantity and reduce the condensed milk by 1 tablespoon to maintain proper consistency. The corn syrup isn’t just for sweetness—it prevents crystallization, ensuring that silky-smooth mouthfeel that distingushes professional confections.
2. Step-by-Step Instructions

Preparation Phase
- Line an 8×8-inch baking pan with parchment paper, leaving overhang on all sides for easy removal. Spritz lightly with neutral cooking spray.
- Set up a double boiler system with a heat-resistant bowl that fits snugly over a saucepan containing about 2 inches of barely simmering water. The bowl should not touch the water surface—indirect heat prevents scorching the delicate ingredients.
- Measure all ingredients before beginning and bring them to room temperature. Cold ingredients introduced to the melting chocolate can cause seizing, which is nearly impossible to reverse without compromising texture.
Fudge Base Creation
- In your double boiler, combine white chocolate, condensed milk, butter, and salt. Stir occasionally with a silicone spatula as the ingredients melt together. The most common mistake here is overheating—keep the heat gentle and remove from heat while a few small pieces of chocolate remain unmelted. Residual heat will complete the melting process.
- Once completely smooth, remove from heat and allow the mixture to cool for exactly 3 minutes. This cooling period is essential for proper incorporation of the flavoring without volatilizing the aromatic compounds. Add the cotton candy flavoring oil and corn syrup, stiring until completely incorporated.
- Divide the mixture evenly between two bowls. Add pink food coloring to one bowl and blue to the other, folding gently to create uniform color without incorporating air bubbles. Fold 1/4 cup cotton candy sugar crystals into each colored mixture.
Assembly Technique
- Working quickly before the fudge begins to set, alternately dollop spoonfuls of pink and blue mixture into your prepared pan. The mixture should still be flowy but not piping hot. If it’s too stiff to spread easily, place back over the double boiler for 10-15 seconds.
- Once all the mixture is in the pan, use a knife or skewer to create gentle swirls. Dont overmix or you’ll lose the distinct color separation that creates the visual cotton candy effect. Three or four passes with the knife is usually sufficient.
- While still warm and glossy, sprinkle the top with remaining cotton candy crystals and freeze-dried pieces. If using pearl dust, wait until the surface has slightly cooled (about 10 minutes) before applying with a dry brush in light, sweeping motions.
Allow the fudge to set at room temperature for at least 4 hours, or preferably overnight. Refrigeration is tempting but can actually cause condensation to form when removed, potentially dissolving your sugar crystal garnish. Room temperature setting results in superior crystalline structure and mouthfeel.
3. Cooking Techniques & Science
The magic of cotton candy fudge lies in its carefully controlled crystallization. Traditional cotton candy is made by melting sugar and spinning it in fine threads that cool rapidly, forming a disorderly crystalline structure that dissolves instantly on the tongue. Our fudge aims to recreate that experience through different means.
The combination of condensed milk and corn syrup introduces glucose and invert sugars that interrupt sucrose crystal formation. This interference creates smaller, more numerous crystals that contribute to the fudge’s smooth texture while still delivering that distinctive cotton candy melt-away sensation. The fat content from white chocolate and butter further impedes large crystal development, resulting in a silky mouthfeel that balances the candy’s inherent sweetness.
Temperature control is non-negotiable. Overheated white chocolate breaks its emulsion, releasing cocoa butter and creating an oily, grainy product. The proper double-boiler setup maintanes gentle heat that stays below 110°F (43°C)—the critical point where white chocolate begins to destabilize. Professional confectioners often use laser thermometers to monitor this precisely, but the visual cue of small unmelted pieces remaining when removed from heat serves as a reliable indicator.
The marbling technique employed isnt merely aesthetic—it creates pockets of concentrated flavor that deliver the sensory surprise associated with cotton candy. As you bite through the fudge, these flavor variations replicate the experience of cotton candy dissolving unevenly on your palate, enhancing the nostalgic connection.
4. Serving & Pairing Suggestions
Cotton Candy Fudge Squares should be cut into precisely 1-inch squares using a hot, clean knife for professional edges. Between each cut, wipe the blade clean and reheat to prevent dragging and maintain the visual integrity of the swirl pattern. For upscale presentation, individually wrap squares in waxed tissue paper and place in petit four cups.
These confections shine when served as part of a nostalgic dessert flight. Consider pairing with micro scoops of caramel corn ice cream, tiny funnel cake bites with berry coulis, or sophisticated takes on other fairground favorites. The sweet, aromatic profile also balances beautifully against bitter espresso or a spiced chai tea.
For retail display, arrange squares in a graduated pyramid under soft lighting that enhances the pearlescent finish. The limited color palette of pink and blue creates immediate visual recognition of the cotton candy flavor profile, making these an excellent impulse purchase item near checkout areas.
If incorporating into a dessert menu, consider using these squares as a garnish for a deconstructed vanilla bean panna cotta or as the crown jewel atop a funfetti celebration cake. Their firm texture and concentrated flavor make them an excellent architectural element that maintains structural integrity even when paired with softer dessert components.
5. Storage & Shelf Life
Proper storage is crucial for maintaining both texture and flavor profile. Store fudge squares in an airtight container with parchment paper between layers. At room temperature (68-72°F), they maintain optimal texture for 7-10 days. Refrigeration extends shelf life to 2-3 weeks but slightly compromises texture.

Cold storage can sometimes mute the volatile compounds in the cotton candy flavoring. If refrigerated, allow squares to come to room temperature for 30 minutes before serving to revive the full aromatic experience. Freezing is possible for up to 3 months, but upon thawing, the sugar garnish may develop condensation issues.
Humidity is the greatest enemy of these confections. In environments above 65% humidity, the sugar crystals on top will begin to dissolve within hours. In professional settings, display cases with humidity control or silica gel packets in storage containers can mitigate this issue.
Conclusion
Cotton Candy Fudge Squares represent confectionery artistry at its most playful while still demanding technical precision. The balance between nostalgia and refined execution makes these treats uniquely positioned to appeal to both sophisticated palates and those seeking comfort in familiar flavors.
The key to truly exceptional results lies in respecting the temperature-sensitive nature of the ingredients and understanding the crystallization science that delivers that distinctive cotton candy experience. Don’t rush the setting process—those hours of patience translate directly into textural perfection.
For professional confectioners, these squares offer excellent profit margins and marketing potential. Their vibrant colors and nostalgic appeal make them highly Instagram-worthy, driving social media exposure and foot traffic. Consider seasonal variations—pumpkin spice cotton candy for fall or peppermint cotton candy for winter holidays—to maintain customer interest throughout the year.
Whether you’re crafting these for a high-end patisserie, specialty candy shop, or as a signature wedding favor, Cotton Candy Fudge Squares demonstrate that playfulness and professionalism can coexist beautifully in the world of confectionery.
FAQs
Why did my fudge turn grainy instead of smooth?
Graininess typically results from improper temperature control or seizing. Ensure your white chocolate never exceeds 110°F and that all utensils are completely dry—even a drop of water can cause chocolate to seize. If your fudge begins to look oily or separated during melting, immediately remove from heat and add 1-2 teaspoons of warm heavy cream while stirring vigorously to re-emulsify.
Can I use regular food coloring instead of gel?
Liquid food coloring introduces additional moisture that can affect the fudge’s setting properties and potentially cause sugar migration. Professional-grade gel or powder colors deliver vibrant results without compromising texture. If liquid coloring is your only option, reduce it to 1 drop of each color and increase white chocolate by 2 tablespoons to compensate for the added moisture.
How can I intensify the cotton candy flavor?
Cotton candy flavoring varies significantly between manufacturers. For a more pronounced flavor, try layering different elements—use both the flavoring oil and 1/4 teaspoon of cotton candy flavor powder (the type used for cotton candy machines) folded in just before pouring. Additionally, serving the fudge alongside a tiny tuft of actual cotton candy creates an aromatic component that enhances the sensory experience.
My colors swirled together and became purple. How do I maintain distinct pink and blue swirls?
Temperature and timing are crucial for marbling. Allow the base mixture to cool until it reaches a pudding-like consistency before adding colors. This thicker texture prevents excessive bleeding between colors. Additionally, limit your swirling to 3-4 passes with a skewer, and use a gentle figure-eight motion rather than circular stirring.
Can this recipe be scaled for commercial production?
Yes, but batch size impacts cooling rates and crystallization. For commercial scaling, maintain a maximum batch size of 5 pounds per mixing bowl, and consider using a professional water-jacketed melting tank to ensure consistent temperature throughout the melting process. The setting time will increase with larger batches—allow up to 8 hours for complete crystallization before cutting.

