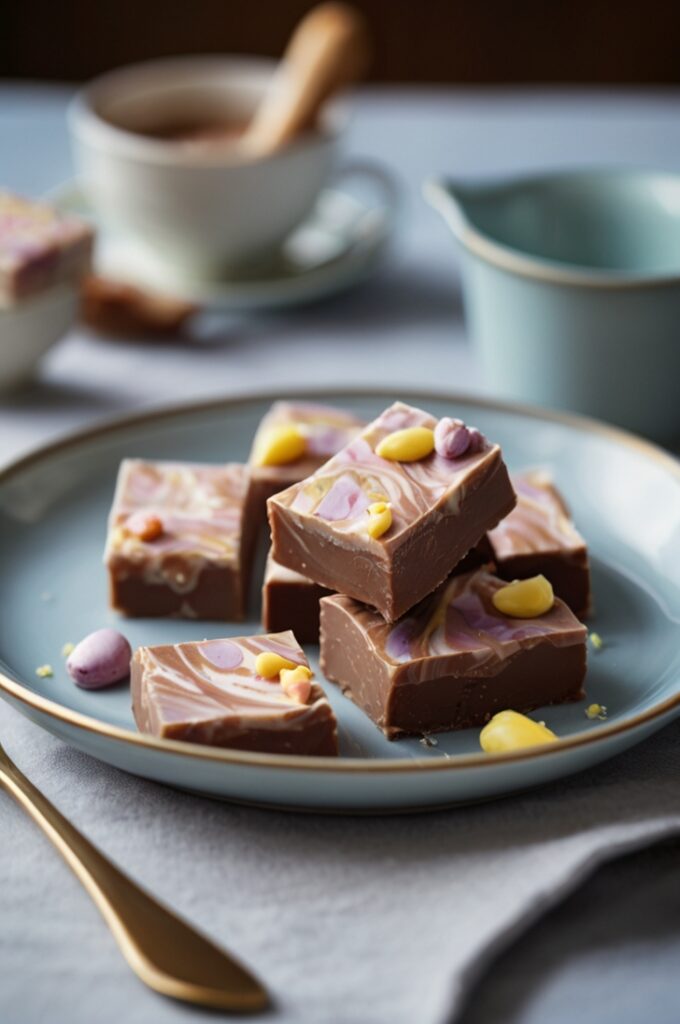
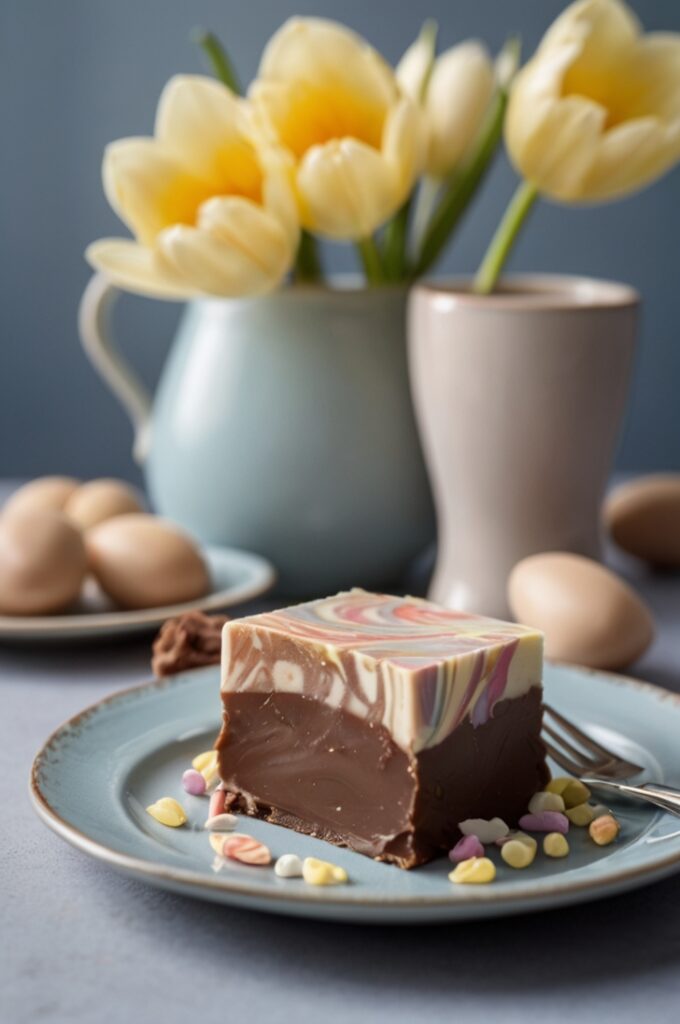
The first time I attempted Easter fudge, I was seven years old helping my grandmother in her tiny kitchen with wallpaper peeling at the corners. The sweet aroma of melting chocolate filled the air as we mixed pastel-colored layers—a memory that returns every spring like clockwork. There’s something magical about the way simple ingredients transform into something extraordinary when Easter rolls around. Wouldn’t you agree that some recipes just capture a season’s essence perfectly?
Easter fudge isn’t just another holiday treat. It’s a canvas for creativity that brings together the rich tradition of confectionery with the vibrant colors of spring renewal. This particular variation—Easy Easter Fudge Spring—stands out because it balances simplicity with visual impact, making it accessible for home cooks while impressive enough for gifting or centerpiece desserts.
Ingredients & Substitutions
Base Fudge Layer
- 3 cups white chocolate chips (or 18 ounces high-quality white chocolate, chopped)
- 1 can (14 ounces) sweetened condensed milk
- 3 tablespoons unsalted butter
- 1/4 teaspoon salt
- 2 teaspoons vanilla extract
Spring Colors & Mix-ins
- Food coloring (pastel green, pink, purple, and yellow)
- 1 cup mini marshmallows
- 3/4 cup spring-colored M&Ms or chocolate eggs
- 1/2 cup pastel sprinkles (jimmies or nonpareils)
- 1/3 cup chopped pistachios (optional)
White chocolate forms the foundation of this recipe, but there’s flexability here. For those who prefer a less sweet base, you can substitute 12 ounces of white chocolate with 6 ounces of high-quality cream cheese (softened), which will create a tangier profile that balances the sweetness. Plant-based folks ain’t outta luck either—coconut condensed milk works beautfully as a 1:1 replacement for traditional sweetened condensed milk.
When selecting white chocolate, reach for products containing actual cocoa butter rather than palm oil substitutes. The difference in meltability and mouthfeel is remarkable—cheaper varieties often leave a waxy film on the palate that distracts from the delicate spring flavors we’re cultivating.
Step-by-Step Instructions

Preparing Your Canvas
Line an 8×8 inch baking pan with parchment paper, leaving overhang on all sides for easy removal. This seems simple, but the smoother you get this lining, the more profeshunal your finished fudge will appear.
In a heavy-bottomed saucepan, combine white chocolate chips, sweetened condensed milk, butter, and salt. Melt over low heat, stirring frequently to prevent scorching. White chocolate burns easily—keep the temperature gentle and patient. You’ll know the mixture is ready when it’s completely smooth with no visible chips remaining.
Remove from heat and stir in vanilla extract. This is the moment many cooks rush through, but don’t skimp on stirring time here—a full minute of incorporation ensures the vanilla distributes evenly throughout the mixture.
Creating Spring Colors
Divide the fudge base into four equal portions in separate bowls. Each portion should be about 1 cup in volume. Working quickly before the fudge sets, add different food coloring to each bowl—pastel green, pink, purple, and yellow. Start with just a few drops; you can always deepen the color, but you can’t lighten it once mixed.
The magic happens in how you layer these colors. Unlike traditional fudge, we’re going for a marbled effect that mimics spring’s unpredictability. Pour alternating spoonfuls of different colored fudge into your prepared pan, creating a random pattern. No need for precision—nature isn’t perfect, and neither should your fudge be.
Once all colors are in the pan, use a butter knife or skewer to gently swirl the mixtures together. Don’t overdo this step! Three or four passes through the fudge is enough to create beautiful marbling without muddying the colors.
Adding Texture and Interest
While the fudge is still warm and pliable, sprinkle your mini marshmallows, chocolate eggs, sprinkles, and pistachios (if using) across the top. Press them gently into the surface so they adhere but remain partly visible.
The temperature window here is crucial—too hot and your marshmallows will melt completely; too cool and the toppings won’t stick. The ideal moment is when the fudge has cooled just enough to hold its shape but still feels pliable when touched with a clean finger.
Allow the fudge to cool completely at room temperature for at least 2 hours. For cleaner cuts, refrigerate for an additional 30 minutes before slicing. The patience you show here directly correlates to the presentation quality.
Cooking Techniques & Science
The success of Easter fudge hinges on understanding crystallization. Traditional fudge relies on precise temperature control to manage sugar crystals, but our recipe takes a different approuch by using white chocolate as the crystallization base. The cocoa butter in white chocolate creates stable crystal structures that set without the need for thermometers or soft-ball stages.
This stability comes at a price, however—white chocolate seizes easily when overheated. The lipids separate from the solids, creating a grainy, unusable mass. That’s why we combine it with condensed milk from the beginning, as the milk proteins act as emulsifiers that keep everything smooth.
The marbling technique we’re using actually has roots in Renaissance paper-making, where artisans would float inks on water before transferring patterns to paper—a process called “ebru.” Our fudge adaptation works because the different colored portions have identical viscosities, allowing them to flow alongside each other without immediate integration.
For those working in humid environments, consider adding 1 tablespoon of corn syrup to the base mixture. This hygroscopic ingredient attracts moisture, preventing the surface of your fudge from becoming sticky during storage.
Serving & Pairing Suggestions
Easy Easter Fudge Spring deserves thoughtful presentation. Cut it into 1-inch squares for traditional service, or use spring-themed cookie cutters for themed shapes like eggs, flowers, or bunnies. The vibrant colors look stunning arranged on a simple white platter with fresh mint leaves scattered between pieces.
For a dessert board that celebrates the season, pair this fudge with fresh strawberries, blueberries, and delicate cookies like lavender shortbread or lemon thins. The fruity acidity balances the fudge’s sweetness.
Beverages that complement this confection include Earl Grey tea (the bergamot notes enhance the vanilla), sparkling water with a twist of lemon (cleanses the palate between bites), or even a glass of prosecco for adult gatherings (the effervescence cuts through the richness).
Gift-giving presentation elevates this recipe to another level. Package fudge pieces in clear cellophane bags tied with raffia in complementary spring colors. Or layer pieces in vintage teacups lined with pastel tissue paper—an elegant hostess gift that doubles as a keepsake.
Making It Your Own
The template provided here invites personalization. Some of my favorite variations include:
- Citrus Infusion: Add 1 tablespoon of lemon, lime, or orange zest to the base before dividing and coloring. The brightness cuts through the sweetness and enhances spring flavors.
- Floral Notes: Replace the vanilla extract with 1 teaspoon of rose water or 1/2 teaspoon of lavender extract. Garnish with crystallized edible flowers like violets or rose petals.
- Textural Contrast: Fold 1/2 cup of crushed freeze-dried strawberries or raspberries into one of the colored portions. This adds tangy pockets and crunchy moments that surprise the palate.
For those concerned about artificial coloring, natural alternatives include:
- Green: matcha powder or spinach powder
- Pink: beet powder or freeze-dried strawberry powder
- Yellow: turmeric or saffron infusion
- Purple: purple sweet potato powder or blueberry powder
These natural colorants offer subtle flavor dimensions that commercial food coloring cannot, tho they typically yield more muted hues.
Storage & Make-Ahead Tips

Easter fudge reaches its flavor peak after 24 hours, when the vanilla has fully permeated the mixture. Store it in an airtight container with parchment separating layers.
At room temperature (around 70°F), this fudge maintains optimal texture for up to 5 days. Refrigerated, it will last 2 weeks but should be brought to room temperature before serving to restore its creamy mouthfeel.
Freezing is possible for up to 3 months—wrap tightly in plastic, then foil, and thaw overnight in the refrigerator. However, some marshmallow toppings may become chewy rather than soft after freezing.
Conclusion
Easy Easter Fudge Spring isn’t merely a seasonal treat—it’s a celebration of transition and renewal captured in edible form. The marbled pastel colors mirror the gradual awakening of the natural world, while the familiar comfort of fudge grounds us in tradition.
What makes this recipe truly special is its adaptability. Whether you’re a novice cook making memories with children or an experienced confectioner looking to expand your repertoire, the forgiving nature of this method ensures success while leaving room for artistic expression.
Remember that imperfection is part of the charm—let each batch tell its own story through unique swirls and distribution of toppings. In a world of mass-produced confections, the handcrafted irregularities of homemade fudge speak of care and presence—the truest gifts we can share during holiday gatherings.
FAQs
Q: Why did my white chocolate seize while melting?
A: White chocolate typically seizes when it gets too hot or comes into contact with water. Always melt on low heat and ensure all utensils are completely dry. If it does seize, sometimes adding 1-2 teaspoons of neutral vegetable oil and whisking vigorously can rescue it.
Q: Can I make this recipe dairy-free?
A: Absolutely! Use dairy-free white chocolate chips (look for those made with coconut oil), coconut condensed milk, and plant-based butter. The results won’t be identical in texture—typically slightly softer—but the visual impact remains stunning.
Q: How far in advance can I make this for an Easter gathering?
A: For optimal freshness, prepare your fudge 1-3 days before serving. This allows flavors to meld while maintaining the ideal creamy texture. If made further ahead, freezing is preferable to refrigeration for periods longer than a week.
Q: My fudge didn’t set firmly enough. What went wrong?
A: Insufficient setting usually results from too much moisture in the mixture. This could be from added extracts or from not cooking long enough to evaporate excess moisture. Next time, try cooking the mixture 1-2 minutes longer or adding an extra 1/4 cup of white chocolate to strengthen structure.
Q: Can children help make this recipe?
A: This is an ideal recipe for involving children aged 6+ with supervision. Let them choose colors, create the marbling effect, and add toppings. Just keep them away from the hot melting phase, which should be handled by adults.

