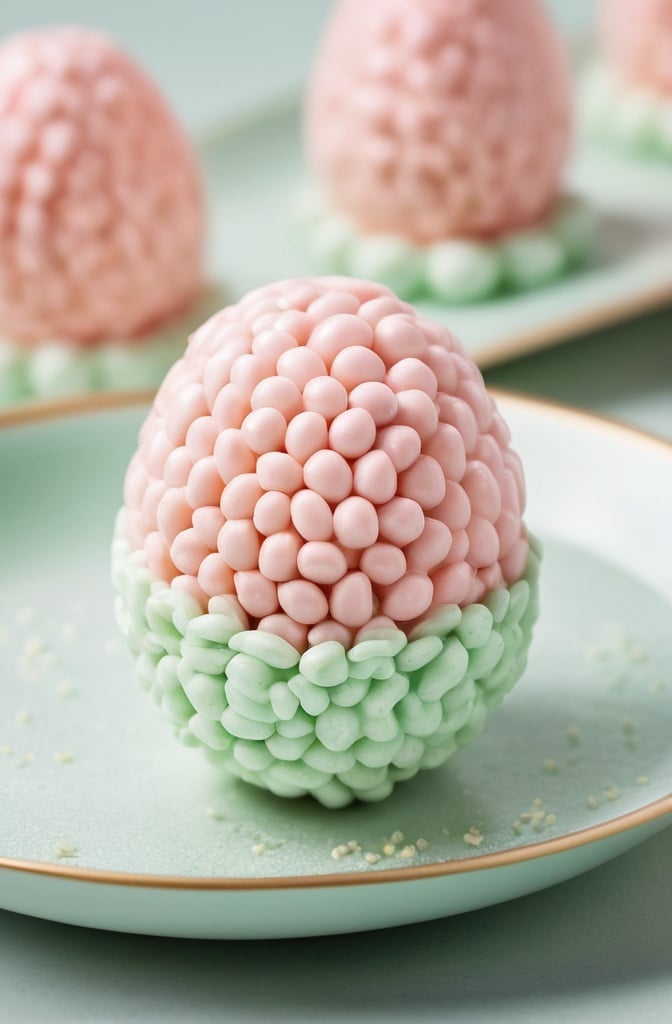
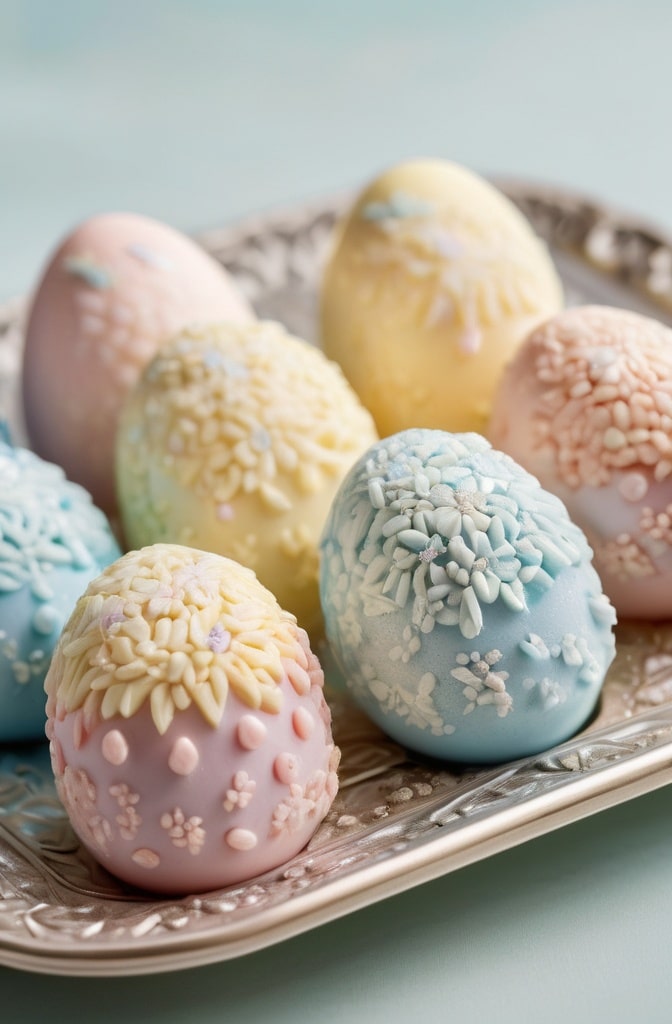
I still remember the first time I watched my grandmother transform ordinary Rice Krispies into magnificent Festive Rice Krispie Eggs. The kitchen smelled of melted butter and vanilla as her hands, worn from decades of cooking, shaped the sticky mixture with surprising precision. That memory sparked my own culinary journey with these treats, which have since evolved from simple holiday novelties to sophisticated Festive Rice Krispie Eggs featured on my restaurant’s seasonal dessert menu.
Rice Krispie Eggs aren’t just nostalgic treats—they’re versatile culinary canvases that allow for remarkable creativity and personalization. What makes them truly special is their adaptability: while maintaining the beloved crispy-chewy texture base, they can be elevated through artisanal ingredients, professional molding techniques, and decorative finishes that transform them from kiddie treats to elegant dessert presentations.
Ingredients & Substitutions
Core Ingredients
- 6 tablespoons unsalted European-style butter (84% butterfat)
- 10 cups mini marshmallows, preferably a premium brand
- 1/2 teaspoon fine sea salt
- 2 teaspoons pure vanilla extract or vanilla bean paste
- 9 cups Rice Krispies cereal (original, not flavored varieties)
- Food coloring (gel-based preferred)
- Decorative sprinkles, edible glitter, or crushed freeze-dried fruits
The butter quality makes an enormous diference here—European styles with higher butterfat create a more luxurious mouthfeel and richer flavor profile. For marshmallows, artisanal or homemade marshmallows provide superior meltability and a cleaner flavor, but good-quality store brands work well too.
For those with dietary restrictions, plant-based butters can work surprisingly well, particularly oat-based varieties that have a neutral flavor. Vegan marshmallows (made without gelatin) tend to be slightly firmer but will melt properly with a bit more patience and lower heat. For gluten-sensitive individuals, certified gluten-free rice cereals create an identical texture expereince.
Rather than artificial food coloring, I often reccommend natural alternatives like butterfly pea flower powder (blue), beet powder (pink), turmeric (yellow), or matcha (green). These add subtle flavor dimensions while providing beautiful, earthy color palettes appropriate for sophisticated presentations.
Step-by-Step Instructions

Preparing Your Base Mixture
- In a large, heavy-bottomed pot, melt the butter over medium-low heat until just liquified but not browning. Watch carefully—the difference between melted and browned butter is mere seconds, and while brown butter has lovely notes, it changes the final texture.
- Add marshmallows and reduce heat to low, stirring constantly with a silicone spatula. Most home cooks rush this step, but professional execution requires patience—about 4-5 minutes of gentle heat and constant movement to achieve a perfectly smooth, glossy mass without any unmixed pockets.
- Once completely melted, remove from heat immediately and stir in salt and vanilla. This timing is critical; adding flavorings while still on heat can cause vanilla to lose it’s delicate top notes.
A common mistake is overcooking the marshmallow mixture, which results in rock-hard treats after cooling. The ideal consistency resembels thick honey—fluid enough to coat the cereal but thick enough to hold its shape. If you’re working with natural colorings, incorporate them now, before adding the cereal.
Incorporating Cereal and Forming Eggs
- Working quickly but methodically, add the Rice Krispies in two batches, folding gently with a buttered spatula until every piece is evenly coated. The mixture will be sticky and resistant—a gentle touch preserves the cereal’s structure instead of crushing it into dust.
- Allow the mixture to cool just slightly (about 2 minutes) before handling. This brief rest prevents burns while maintaining enough pliability for shaping.
- Lightly butter your hands and a 2-part plastic egg mold (professional silicon egg molds designed for chocolates work beautifully, but plastic Easter eggs can suffice). Press the mixture firmly into each half of the mold, overfilling slightly.
For a spicier interpretation, try folding 1/2 teaspoon of cardamom and a pinch of saffron into the warm mixture before shaping. This Middle Eastern-inspired variation has become one of our most requested special items during spring festivals.
Finishing Techniques
- Close the mold firmly, trimming any excess mixture that squezes out with a small paring knife. Don’t worry about achieving perfect seams—these can be disguised with decorative elements later.
- Allow eggs to set in the molds for at least 10 minutes before attempting removal. If the eggs resist releasing, place the molds in the freezer for 2 minutes—the slight contraction from cold helps separate them cleanly.
- Once released, place eggs on a parchment-lined sheet to finish setting, about 30 minutes at room temperature.
For more complex decorative work, a “double setting” technique works wonders: after the initial 30-minute set, dip sections in melted white chocolate or colored candy coating, then add secondary decorative elements before the coating hardens.
Cooking Techniques & Science
The science behind perfect Rice Krispie treats lies in understanding sugar crystallization and protein denaturation. Marshmallows contain gelatin (a protein) that creates their distinctive chew. When heated, these proteins unfold and then realign as they cool, forming the chewy matrix that gives the treats their texture.
Temperature control is cruicial throughout the process. The butter-marshmallow mixture should reach approximately 160°F (71°C)—hot enough to fully melt but not so hot that it begins to caramelize the sugars. Caramelization begins at approximately 320°F (160°C) and would create brittle, hard treats rather than tender ones.
The ratio of marshmallow to cereal represents the most important formula in this recipe. At 10:9, we’ve calibrated for the perfect balance between structural integrity (necessary for the eggs to hold their shape) and pleasant eating texture. Professional pastry kitchens often use a digital scale for precision—approximately 400g marshmallows to 270g cereal achieves the ideal composition.
Specialized tools like silicone egg molds designed for entremet cakes offer the cleanest, most professional results. Their flexibility and heat resistance allow for easy release without distorting the egg shape. In their absence, food-grade silicone putty can be used to create custom molds that perfectly fit standard plastic Easter eggs.
Serving & Pairing Suggestions
Display these festive eggs on a “nest” of pulled sugar for maximum visual impact. The contrast between the textures creates an elegant presentation suitable for upscale brunch buffets or dessert tables.
For plated desserts, serve a halved Rice Krispie egg alongside complementary elements—a quenelle of cardamom ice cream, dots of fruit coulis, and a sprinkle of crushed pistachios creates a sophisticated composition with balanced textures and temperatures.
Beverage pairings depend on your flavor variations, but classic Rice Krispie eggs work beautifuly with:
- Earl Grey tea or coffee service (the bergamot and vanilla notes complement each other)
- A light dessert wine like Moscato d’Asti
- Champagne or prosecco (particularly if your eggs feature freeze-dried fruit inclusions)
- Milk-based cocktails like White Russians or Brandy Alexanders
Consider timing when serving these treats. Unlike many desserts, Rice Krispie eggs maintain optimal texture for only about 2 days. After that, humidity begins to affect the cereal’s crispness. For professional service, prepare them no more than 24 hours in advance of presentation.
Advanced Variations

Layered Gradient Eggs
Create stunning ombré eggs by dividing the base mixture into three portions, coloring each a different intensity of the same hue. Layer them in the mold from darkest to lightest for a sophisticated gradient effect. This technique requires slightly more working time, so keep the unused portions warm by placing the bowl over a pot of hot (but not simmering) water.
Filled Center Eggs
For a truly spectacular presentation, create hollow Rice Krispie eggs that can be filled with complementary treats. To achieve this:
- Press the mixture around the perimeter of each mold half, leaving the center hollow.
- After setting and joining the halves, use a small piping tip to fill the center with ganache, mousse, or a contrasting flavor of Rice Krispie mixture.
- Seal the filling hole with a small amount of melted white chocolate.
Textured Exteriors
Professional pastry chefs distinguish their creations through texture variation. Create patterned exteriors by:
- Pressing textured silicone mats against the surface while still pliable
- Rolling the formed eggs in crushed freeze-dried fruits, cocoa nibs, or finely chopped nuts
- Creating “speckled” eggs by flicking thinned food coloring using a clean paintbrush
Conclusion
Rice Krispie Eggs represent the perfect intersection of nostalgia and culinary craftsmanship. They honor tradition while providing endless opportunities for creative interpretation and technical skill demonstration.
The most successful versions maintain the integral textural experience—that distinctive chewy-crisp mouthfeel—while introducing sophisticated flavor profiles and visual presentations. Whether created for high-end catering, restaurant dessert menus, or simply to elevate home entertaining, these festive treats showcase how fundamental technique and quality ingredients can transform even the most humble preparations into memorable culinary experiences.
Remember that while the techniques described here can be scaled for commercial production, the magic happens in small batches where temperature control and timing can be precisely managed. In professional kitchens, we rarely make more than a dozen eggs at once to ensure consistency and quality across the entire production.
FAQs
How far in advance can I make Rice Krispie Eggs?
Rice Krispie eggs maintain optimal texture for approximately 48 hours when stored in airtight containers at room temperature. After that, humidity begins affecting the cereal’s crispness. For professional service, I recommend preparing them no more than 24 hours before presentation.
Why are my Rice Krispie Eggs too hard?
Excessive hardness typically results from overcooking the marshmallow mixture or using too high heat. This caramelizes the sugars, creating a brittle texture. Always use low heat and remove from the stove as soon as the marshmallows are completely melted.
How can I get my eggs to release cleanly from the molds?
Three key techniques ensure clean release: thoroughly butter the mold before adding the mixture, allow the mixture to cool slightly before handling (about 2 minutes), and if the eggs resist releasing, place the molds in the freezer for 2 minutes—the slight contraction from cold helps separate them cleanly.
Can I make these with natural colors instead of artificial food coloring?
Absolutely. Natural colorants like butterfly pea flower powder (blue), beet powder (pink), turmeric (yellow), or matcha (green) create beautiful, earthy color palettes appropriate for sophisticated presentations. Incorporate these into the marshmallow mixture before adding cereal for even distribution.
What’s the secret to getting the perfect chewy-crisp texture?
The perfect texture comes from three factors: the correct marshmallow-to-cereal ratio (10:9 by volume or 400g:270g by weight), proper temperature control (never exceeding 160°F/71°C during melting), and minimal handling when incorporating the cereal to prevent crushing.

