Growing up, my grandma would always let me lick the spoon after mixing peanut butter cookie dough. Those moments in her kitchen, with sunlight streaming through lace curtains, taught me more about food’s emotional power than any culinary school ever could. Years later, when developing these Peanut Butter Jelly Cookies, I wanted to capture that same nostalgic magic while elevating the humble sandwich combo into something extraordinary.
The peanut butter and jelly sandwich—that lunchbox staple we all grew up with transforms into something magical when reimagined as a cookie. This isn’t just another cookie recipe; it’s childhood comfort wrapped in grown-up sophistication. These cookies deliver the perfect balance of salty-sweet flavors with a tender, melt-in-your-mouth texture that’ll make even professional pastry chefs take notice.
Ingredients & Substitutions
For the Cookie Base:
- 1 cup (226g) unsalted butter, room temperature
- 1 cup (250g) natural creamy peanut butter (see notes on peanut butter selection)
- 1 cup (200g) granulated sugar
- 1 cup (220g) packed light brown sugar
- 2 large eggs, room temperature
- 2 teaspoons vanilla extract
- 2¾ cups (345g) all-purpose flour
- 1 teaspoon baking soda
- 1 teaspoon baking powder
- ½ teaspoon salt
- ⅓ cup (80g) finely chopped roasted peanuts (optional for extra texture)
For the Jelly Center:
- ¾ cup (240g) high-quality fruit preserves (grape, strawberry, or raspberry work beautifully)
- 1 tablespoon cornstarch (mixed with 1 tablespoon cold water)
For the Finish:
- ¼ cup (50g) granulated sugar (for rolling)
- ½ teaspoon flaky sea salt (for sprinkling)
The choice of peanut butter matters enormously in these cookies. Commercial brands like Jif or Skippy will yield a sweeter, more consistent texture, while natural peanut butter produces a more robust, authentic flavor with a slightly more crumbly final product. If using natural peanut butter (which I prefer), make sure its well-stirred before measurin’. For those with peanut allergies, almond or cashew butter work fantastically—just expect a somewhat different flavor profile.
For the preserves, homemade offers unparalelled freshness, but Bonne Maman or Stonewall Kitchen provide excellent store-bought alternatives. Choose preserves over jelly for added fruit texture, though a good jelly can work in a pinch if strained of excess liquid first.
Step-by-Step Instructions

Preparing the Jelly Center
- Pour preserves into a small saucepan over medium-low heat. Bring to a gentle simmer, stirring occasionally to prevent scorching—this is where many home cooks go wrong, rushing the process and ending up with burnt spots that ruin the whole batch.
- Once simmering, whisk in the cornstarch mixture and continue cooking for 2-3 minutes until noticeably thickened. The mixture should coat the back of a spoon and leave a clear path when you run your finger through it. Don’t undercook this component; proper thickening prevents the preserves from liquifying during baking.
- Transfer to a heat-safe container and refrigerate for at least 1 hour (or overnight). This cooling period isn’t just for temperature—it allows the pectin to fully set, creating that perfect jammy consistency that won’t bleed into your cookie dough.
Making the Cookie Dough
- In the bowl of a stand mixer fitted with a paddle attachment, cream together butter and peanut butter on medium-high speed until smooth and lightened in color, about 2 minutes. The texture here should remind you of a fluffy cloud—airy and light. Scrapin down the sides halfway through ensures even incorporation.
- Add both sugars and beat for 3 more minutes until the mixture becomes pale and fluffy. This extended creaming process incorporates crucial air into the dough, affecting final texture. Many bakers underestimate the importance of this step, but it’s what gives these cookies their tender crumb.
- Add eggs one at a time, mixing well after each addition, followed by vanilla extract. At this stage, the mixture might look slightly curdled—that’s perfectly normal and will resolve once the dry ingredients are added.
- In a separate bowl, whisk together flour, baking soda, baking powder, and salt. With the mixer on low, gradually add the dry ingredients to the wet mixture, mixing just until no flour streaks remain. Overmixing here activates gluten, resulting in tough cookies—the cardinal sin of cookie baking.
- If using, fold in the chopped peanuts by hand with a spatula. This gentle approach preserves the air you’ve worked so hard to incorporate.
- Cover the dough and chill for at least 2 hours or overnight. I know it’s tempting to skip this step, but chilled dough produces cookies with better flavor development and prevents excessive spreading during baking.
Assembly and Baking
- Preheat your oven to 350°F (175°C) and line two baking sheets with parchment paper or silicone mats. Position racks in the upper and lower thirds of your oven for even heat distribution.
- Place the ¼ cup granulated sugar in a small bowl. Scoop chilled dough using a 1½ tablespoon cookie scoop (about 30g portions), roll into balls, then flatten slightly into discs about 2 inches in diameter.
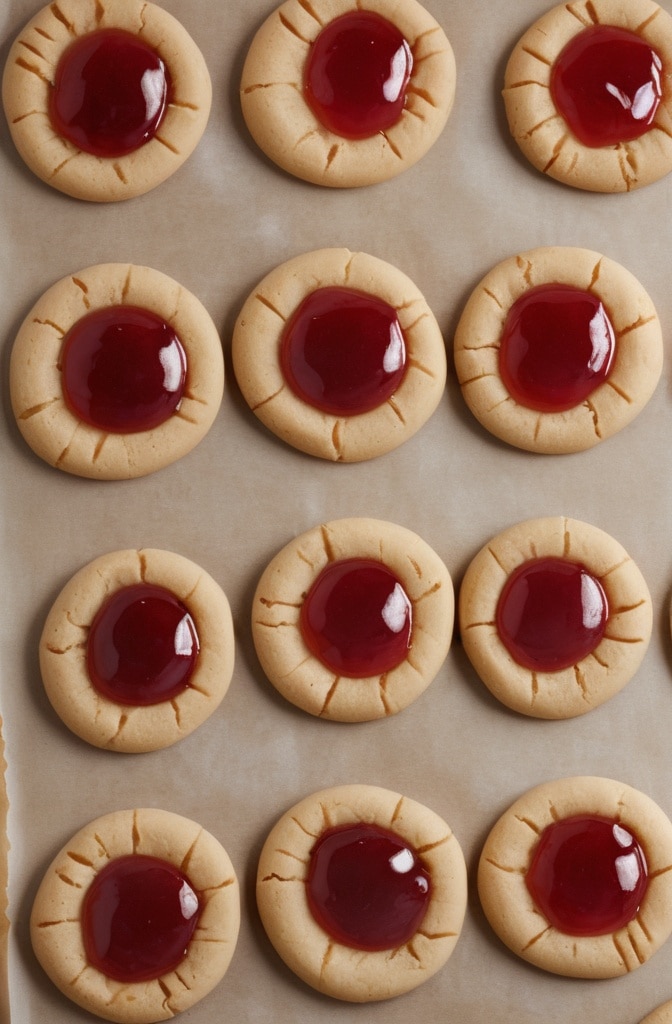
- Create a small indentation in the center of each disc using your thumb or the back of a ½ teaspoon measuring spoon. Fill each indentation with about ½ teaspoon of the thickened preserves. Don’t overfill—it’s tempting to be generous here, but excess jelly will bubble over during baking.
- Take another portion of dough, flatten it, and place over the jam-topped disc. Carefully seal the edges by pinching and rolling between your palms to create a sealed ball. The seal must be complete; any cracks will allow the jam to escape during baking.
- Roll each filled cookie ball in granulated sugar, place on prepared baking sheets spacing 2 inches apart, and gently flatten slightly with the palm of your hand or bottom of a glass. Make a small crosshatch pattern on top using a fork—this isn’t just decorative but helps control the spread.
- Bake for 12-14 minutes, rotating pans halfway through. The cookies are done when the edges are set and lightly golden, but centers still look slightly underbaked. They’ll continue cooking from residual heat after removal. Over-baking is the quickest way to ruin these beauties.
- Immediately sprinkle with flaky sea salt while still hot, then allow to cool on the baking sheets for 5 minutes before transferring to a wire rack to cool completely.
Cooking Techniques & Science
The magic of these cookies lies in the interplay of fat, sugar, and protein. Peanut butter contains both fat and protein, which creates a tender yet structured crumb. The natural oils in peanut butter contribute to moisture retention, while the proteins help provide structure. This balance is critical—too much fat makes cookies greasy, while too much protein makes them tough.
The “thumbprint and seal” method I’ve outlined serves a dual purpose. First, it encapsulates the jelly completely, preventing leakage. Second, it creates distinct textural zones: a tender cookie exterior giving way to a jammy, intensely fruity center. This contrast is what elevates these cookies beyond ordinary peanut butter cookies.

Thickening the preserves with cornstarch before assembly is a crucial technique that prevents the common pitfall of jam bleeding out during baking. The cornstarch modifies the preserves’ viscosity without altering flavor, creating a filling that holds its shape through the heat of baking. Think of it as creating a jam with the structural integrity to withstand 350°F heat.
The baking temperature of 350°F might seem standard, but it’s specifically chosen to allow the cookies to bake through before the bottoms over-brown. A higher temperature would risk burning the sugar-coated exterior before the interior fully sets. A lower temperature would extend baking time excessively, dryin’ out the cookies.
For those baking at high altitude (above 3,500 feet), increase the flour by 2 tablespoons and reduce each sugar by 1 tablespoon to account for faster moisture evaporation. The science of high-altitude baking involves adjusting for decreased air pressure, which affects how quickly moisture evaporates and leavening agents react.
Serving & Pairing Suggestions
These cookies shine brightest when served slightly warm, allowing the jammy center to retain some flow. For an impressive dessert service, reheat cookies for 5-7 seconds in the microwave and serve with a scoop of vanilla bean ice cream—the temperature contrast and complementary flavors create a memorable experience.
For an elegant presentation, dust cooled cookies lightly with powdered sugar and arrange on a wooden board with fresh berries matching your jam flavor. This rustic-but-refined approach works beautifully for everything from dinner parties to upscale afternoon teas.
These cookies pair beautifully with:
- A glass of cold whole milk (the traditional choice that cuts through the richness)
- Earl Grey or English Breakfast tea (the tannins complement the sweet-savory balance)
- A dessert wine like Moscato d’Asti (whose bright acidity and light sweetness echo the jam notes)
- Bourbon or aged rum (for an adults-only pairing that brings out the nutty depths)
For a show-stopping dessert platter, serve these alongside chocolate-dipped strawberries and small glasses of Frangelico or amaretto. The complementary flavors create a cohesive tasting experience while offering textural variety.
These cookies maintain peak quality for 3-4 days when stored in an airtight container at room temperature. For longer storage, they freeze beautifully for up to three months—just thaw at room temperature for an hour before serving.
Conclusion
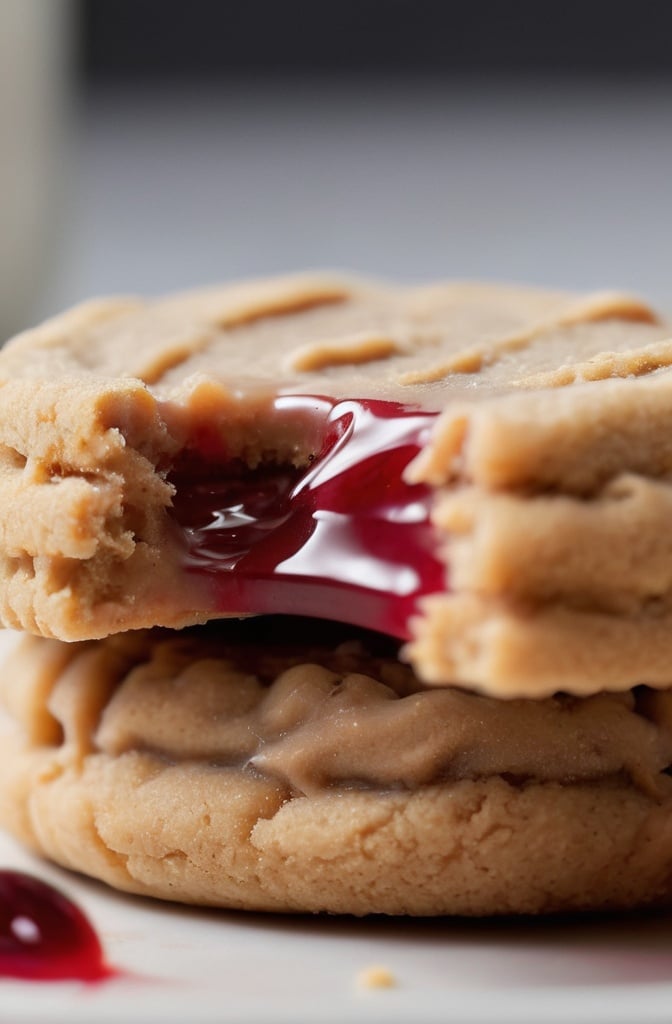
The humble peanut butter and jelly sandwich transformed into these sophisticated cookies represents everything I love about cooking—taking familiar flavors and elevating them through technique and thoughtful ingredient selection. What makes these cookies truly special is the contrast between textures: the slightly crisp exterior giving way to a tender cookie and finally revealing that perfect jammy center.
Master this recipe, and you’ll have a signature dessert that appeals to both sophisticated palates and nostalgic hearts. Like all great recipes, feel free to make it your own over time. Perhaps add a touch of cinnamon to the dough or experiment with exotic jams like fig or blackcurrant. The foundation remains solid, while the variations are endless.
Remember that perfection takes practice—your first batch may not be flawless, but each iteration will bring you closer to cookie nirvana. That’s the beautiful journey of becoming a better baker; each small failure teaches something valuable for next time.
FAQs About Peanut Butter Jelly Cookies
Why did my jam leak out during baking?
This typically happens when the seal between cookie layers isn’t complete. Ensure you’re pinching the edges thoroughly and that there are no thin spots in your top cookie layer. Additionally, check that your preserves were properly thickened—they should be almost paste-like when chilled.
Can I make these cookies ahead of time?
Absolutely! The dough can be refrigerated for up to 3 days or frozen for 3 months. The thickened preserves can be refrigerated for up to a week. You can also freeze fully assembled, unbaked cookies on a sheet pan, then transfer to freezer bags for up to 3 months. Bake straight from frozen, adding 2-3 minutes to the baking time.
How do I prevent my cookies from spreading too much?
Three key factors: properly chilled dough, correct oven temperature, and using parchment paper rather than greasing your baking sheets. If they’re still spreading excessively, try adding an additional 2-3 tablespoons of flour to your next batch, as your flour might have a lower protein content than what the recipe was developed with.
What’s the best peanut butter to use for these cookies?
For the most reliable results, commercial creamy peanut butter (like Skippy or Jif) creates a more consistent cookie. However, natural peanut butter delivers superior flavor—just ensure it’s well-stirred before measuring, and be prepared for a slightly more crumbly texture. Avoid peanut butters with added honey or maple, as these change the moisture content unpredictably.
Can I use homemade jam for these cookies?
Homemade jam works beautifully but often contains less pectin than commercial varieties. For best results, simmer your homemade jam with the cornstarch mixture until it’s slightly thicker than you’d typically make it for toast. The extra thickness ensures it won’t liquify during baking.

